Design - Create - Grow


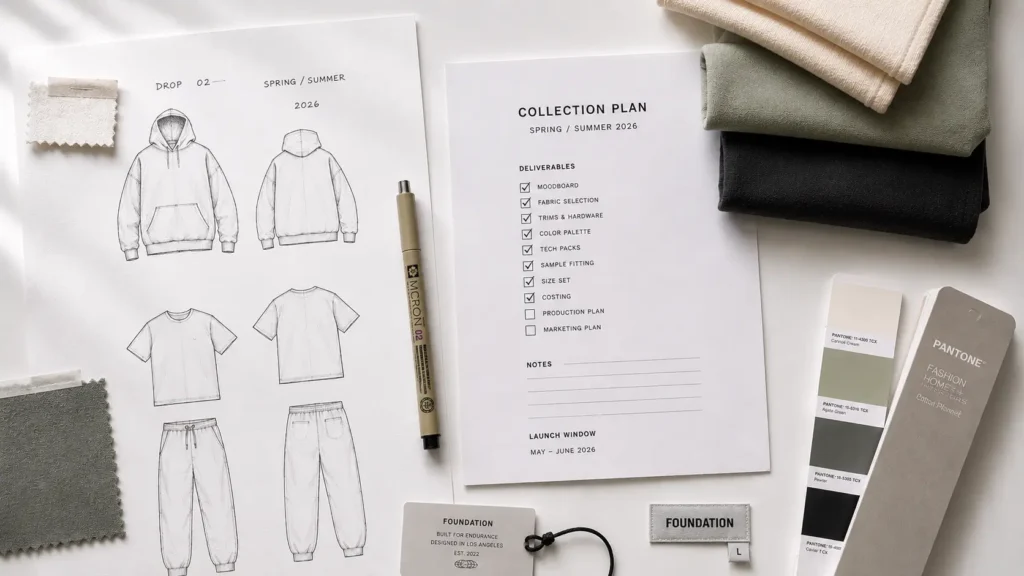
Ready to launch your clothing brand but not sure where to start? You’re not alone. Every week, thousands of aspiring designers sketch ideas, research manufacturers, and hit a wall — overwhelmed by the sheer number of moving parts between concept and first collection.
That’s exactly why having a clothing brand launch checklist isn’t optional — it’s essential. This clothing brand launch checklist breaks down every critical step, from your very first sketch to your first production run, so you don’t miss a thing, waste money on avoidable mistakes, or stall out mid-launch.
Here’s a sobering reality: according to industry estimates, more than 80% of new fashion brands fail within the first two years — and a significant portion collapse before they even reach customers. The leading culprits? Poor planning, skipped steps, and a lack of professional documentation.
If your goal is specifically to build a streetwear label, our complete guide to starting a streetwear brand in 2026 walks through the broader strategy, from defining your niche and designing your collection to manufacturing, marketing, and launch.
In this guide, you’ll get a complete, step-by-step apparel brand startup roadmap — built specifically for independent designers, solo founders, and small teams launching their first or second collection. By the end, you’ll know exactly what to do, in what order, and where to invest your time and money wisely.
⚡Quick Answer: A clothing brand launch checklist covers 10 essential steps — from brand identity and tech pack creation to factory sourcing, sampling, and your first production run. It’s the single most effective tool for avoiding costly delays and production errors. Whether you’re launching 50 units or 500, this checklist keeps you organized, professional, and on schedule.
Why You Need a Clothing Brand Launch Checklist
A clothing brand launch checklist is a structured, step-by-step planning document that guides apparel founders through every stage of bringing a clothing line to market — from brand identity and design development to manufacturer sourcing, sampling, production, and launch.
Without one, you’re guessing. And guessing in fashion is expensive.
Here’s what happens when founders skip steps in the apparel brand startup process:
- No tech pack before factory contact — Manufacturers quote the wrong specs. You waste weeks in back-and-forth emails, and some factories refuse to work with you entirely.
- Skipping the sampling stage — Production errors that could have been caught in a $150 sample cost $4,000 to fix across a 200-unit run.
- No costing model before ordering — Founders discover they’ve priced their product at a loss after the goods are already made.
- Missing legal setup — Selling without an LLC or EIN creates personal liability and blocks you from opening a business bank account or applying for wholesale accounts.
A well-structured clothing line production checklist reduces overwhelm by breaking an intimidating process into manageable steps. It creates accountability — you know exactly what’s done and what’s next. It saves money by front-loading decisions that are cheap to change early and expensive to change later.
Real-world example: Maya, a solo founder launching a women’s streetwear line, used a launch checklist to map her 14-month timeline before spending a dollar. When she contacted her first manufacturer, she had a completed tech pack and a clear sample brief ready. The factory responded within 48 hours. Contrast that with her co-founder’s first attempt two years prior — no documentation, four months of delays, and $3,200 wasted on a sample that was never approved.
A checklist isn’t busywork. It’s your competitive advantage.
Free Planning vs. Professional Documents — What’s the Difference?
One of the most common apparel brand startup steps that founders get wrong is underestimating the gap between early-stage planning tools and the professional documents factories actually need.
Here’s an honest breakdown:
| Feature | DIY / Free Tools | Starter Bundle ($) | Techpack Mega Bundle ($$) |
|---|---|---|---|
| Detail Level | Low — general notes, sketches | High — structured spec sheets, front/back views | Very High — full construction specs, grading, BOM |
| Factory Acceptance Rate | Low — most factories request rewrites | High — professionally structured for manufacturer review | Very High — industry-standard format, accepted globally |
| Time to Create | Fast (hours) but incomplete | Moderate (1–2 days with template) | Moderate (2–3 days with full template suite) |
| Cost | Free | Low one-time investment | Low–moderate one-time investment |
| Scalability | Poor — rebuilding required at every stage | Good — reusable across styles | Excellent — full production-ready documentation suite |
| Revision Flexibility | Difficult — unstructured format | Easy — editable, modular templates | Easy — layered, fully editable templates |
To be clear: DIY tools are perfectly fine for early ideation. Notion boards, mood boards, and simple sketch-to-notes documents serve a purpose in the early concept stage. You don’t need a full tech pack to decide on your niche or sketch your first silhouette.
But the moment you pick up the phone (or write that first email) to a manufacturer, everything changes. Factories are production businesses — they speak the language of measurements, tolerances, construction notes, and material specs. If you can’t communicate in that language, you slow down every step of the clothing line production checklist from that point forward.
That’s where professional templates — built around the apparel industry’s real documentation standards — pay for themselves on day one.
How to create a tech pack from scratch
The Complete Clothing Brand Launch Checklist — Step by Step
This is your full clothing brand launch checklist: 10 steps, in sequence, with everything you need at each stage.
1. Define Your Brand Identity — Know Who You Are Before You Design
Foundation Step
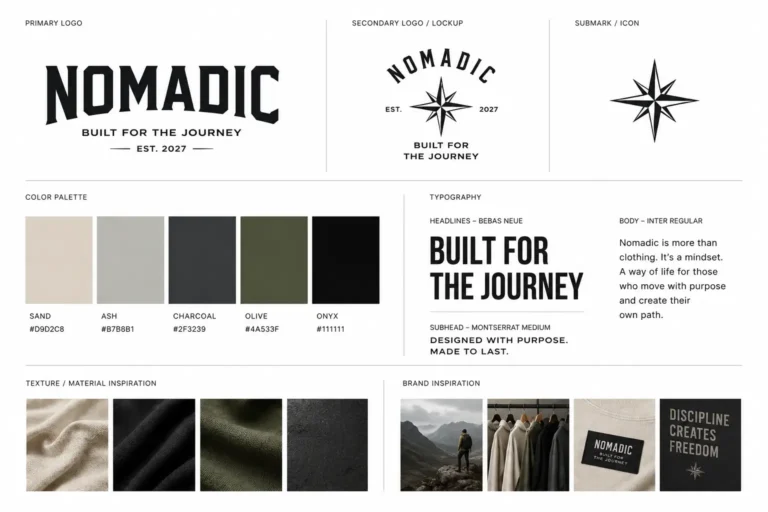
Before you design a single garment, you need to know who you’re designing for — and why your brand exists. Brand identity isn’t just a logo. It’s your niche, your target customer, your aesthetic, your price point, and your mission statement all working together.
What you’ll need: Brand positioning worksheet, competitor research, customer persona template, name availability check
Common mistake: Skipping this step and designing “for everyone.” The most successful indie brands start hyper-specific — “sustainable activewear for women in their 30s” beats “casual clothing for all ages” every time.
Checklist:
- ✓ Define your niche and target customer (age, lifestyle, income, aesthetics)
- ✓ Research 5–10 competitor brands (pricing, positioning, gaps in market)
- ✓ Write a 1–2 sentence brand mission statement
- ✓ Confirm your brand name is available (domain, social handles, trademark search)
- ✓ Choose 2–3 words that describe your brand’s visual tone (e.g., “clean, minimal, utilitarian”)
💡Pro Tip: Run a quick search on USPTO trademark database before you fall in love with a name. A trademark conflict discovered after you’ve printed 500 hangtags is a painful and expensive lesson.
2. Create Your Initial Designs & Mood Board — Build Your Visual Direction
Design Step
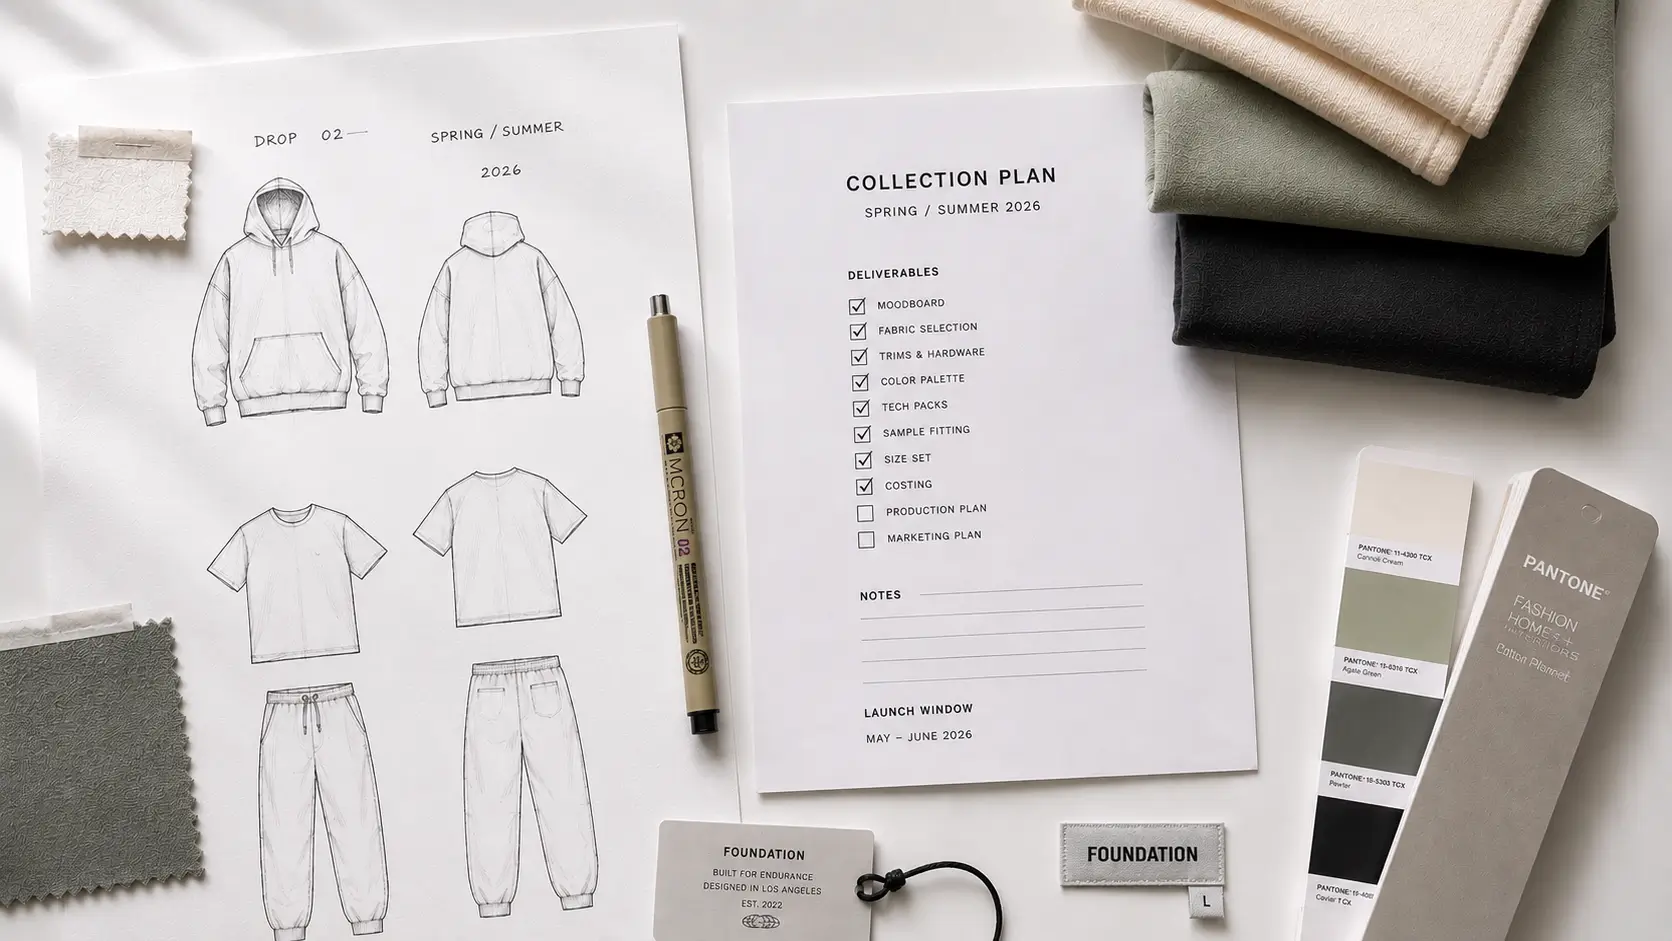
This is where your ideas become tangible. Mood boards, flat sketches, and fabric references give you — and future collaborators — a clear picture of the collection before a single pattern is cut.
What you’ll need: Procreate, Adobe Illustrator, or hand sketches; Pinterest or Are.na for mood board; Pantone or fabric swatch references
Common mistake: Creating mood boards without any construction logic. Beautiful inspiration images don’t tell a factory what to build. Use your mood board as a reference, then translate it into technical language in Step 3.
Checklist:
- ✓ Collect 20–30 reference images (silhouettes, fabrics, color palettes, details)
- ✓ Sketch flat front and back views of each style (doesn’t have to be perfect — clear is enough)
- ✓ Define your colorway for the collection (2–4 colors max for a first run)
- ✓ Note key design details (pocket placement, stitching type, hardware, labels)
- ✓ Identify fabric families and weights you’re targeting
3. Develop Your Tech Packs — The Most Important Production Document You’ll Create
Design Step
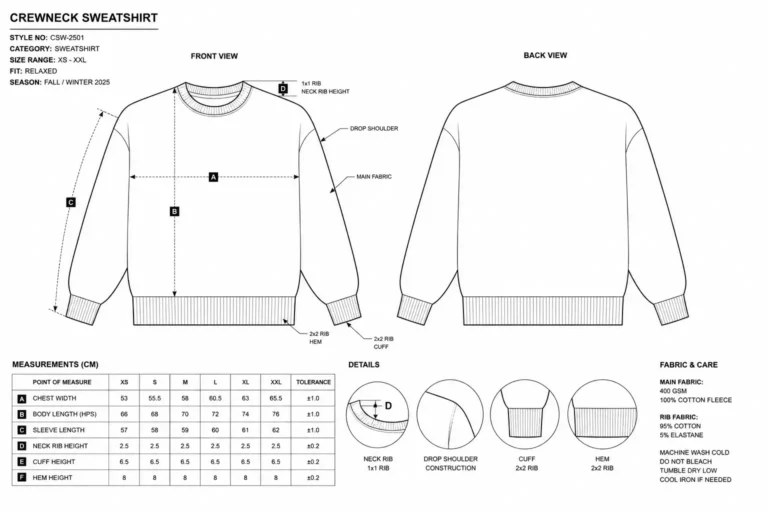
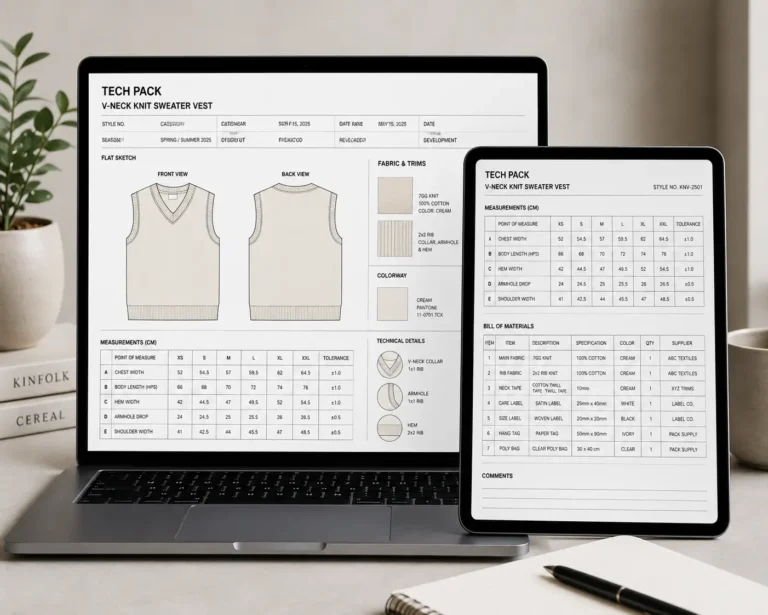
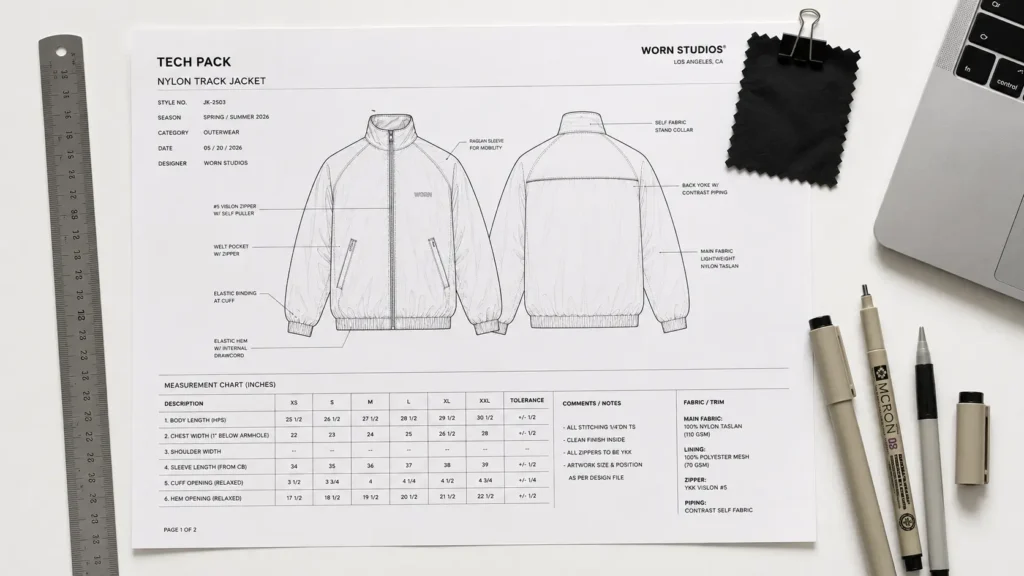
Here’s where most first-time founders fall short — and where the most money is lost. A tech pack (technical package) is the document that tells your manufacturer exactly how to build your garment: measurements, materials, construction details, label placement, hardware specs, seam allowances, and more.
Without a complete tech pack, you’re asking a factory to guess. And factories that guess bill you for the privilege of being wrong.
Tech pack errors cost brands an average of $2,000–$8,000in production reworks — and that’s before you factor in timeline delays that push your launch back by months.
What you’ll need: Tech pack template (front/back technical sketch, measurement spec sheet, BOM, construction notes), Adobe Illustrator or Canva for technical flats
Common mistake: Sending a flat sketch and a few notes and calling it a “tech pack.” Factories require spec sheets with actual measurements, material callouts, and grading instructions before they’ll produce a sample.
Checklist:
- ✓ Complete front and back technical flat sketches for each style
- ✓ Fill in all measurements (body measurements + ease, per size)
- ✓ Write construction notes (seam type, stitch count, finishing details)
- ✓ List all materials with fabric content, weight, and suggested suppliers
- ✓ Include label placement diagrams and trim details
→ Grab the Tech pack Mega Bundle — Trusted by 2,400+ designers, rated 5.0 stars, with lifetime access and full commercial license included. It’s the most complete tech pack template suite available for indie brands.
→ Or Start with the Starter Bundle if you’re at the early design stage and want mockup templates alongside your tech pack documents.
💡Pro Tip: Never contact a manufacturer without a completed tech pack — it signals professionalism and dramatically reduces miscommunication. Factories respond faster, quote more accurately, and take your project more seriously when you arrive prepared.
4. Source & Vet Your Manufacturer — Find the Right Production Partner
Production Step
Sourcing the right factory is one of the most consequential decisions in your entire clothing line production checklist. The wrong manufacturer — wrong MOQ, poor communication, inconsistent quality — can sink a brand before it launches.
Domestic vs. overseas: Domestic manufacturers (USA, UK, EU) offer faster turnaround, easier communication, and “Made in [Country]” branding — but typically cost 30–60% more per unit. Overseas factories (China, Bangladesh, Portugal, Turkey) offer lower unit costs but longer lead times, higher MOQs, and greater communication complexity.
What you’ll need: Sourcing platforms (Maker’s Row for domestic, Alibaba or Sewport for international), factory vetting questionnaire, NDA template
Common mistake: Contacting a factory without knowing your MOQ tolerance. If a factory’s minimum order quantity is 300 units per style and you only want 50, you’ve wasted both parties’ time.
Checklist:
- ✓ Decide: domestic or overseas (based on budget, timeline, and brand story)
- ✓ Build a list of 5–10 candidate factories from sourcing platforms
- ✓ Send a factory inquiry email with your tech pack and target quantities
- ✓ Request certifications (GOTS, OEKO-TEX, WRAP) if sustainability is a brand pillar
- ✓ Video call or visit top candidates before committing
Browse verified manufacturers on Sewport
5. Request & Approve Samples — Don’t Skip This Stage
Production Step
Sampling is your insurance policy. It’s the stage where everything you’ve specified on paper becomes a physical garment — and where every error in your tech pack becomes visible before it becomes expensive.
What you’ll need: Sample brief, fit model or dress form (matching your target size), sample feedback form, revision tracking document
Common mistake: Approving a sample you’re “mostly happy with” to save time or money. Production amplifies every flaw. A collar that sits slightly off on a sample sits exactly that off — times 200 — in your production run.
Checklist:
- ✓ Request a proto sample (first physical interpretation of your tech pack)
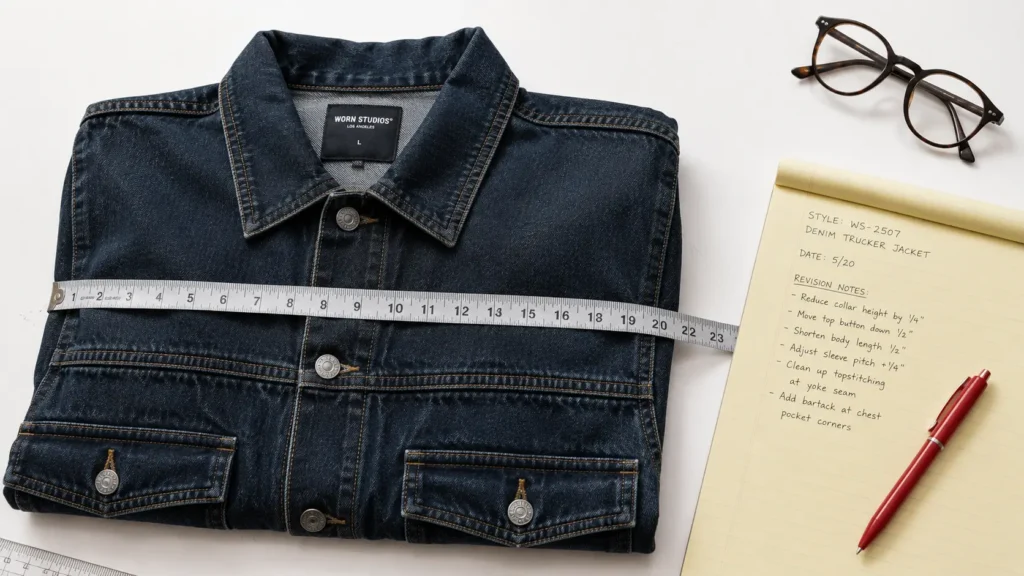
- ✓ Document all fit issues, construction deviations, and material substitutions
- ✓ Send written revision notes — never rely on verbal or voice-note feedback
- ✓ Approve a sealing sample before full production begins
- ✓ Order at least 2–3 sample rounds before committing to bulk
💡Pro Tip: Order at least 2–3 sample rounds before committing to a full production run. It’s far cheaper to fix errors in sampling than in bulk. A $200 sample round that catches a pocket-placement error saves you $2,000 in rework fees.
6. Finalize Costing & Pricing — Know Your Numbers Before You Commit
Business Step
Most founders underestimate what it actually costs to bring a garment to market. Your COGS (cost of goods sold) includes more than just the factory price — it includes materials, trims, labels, shipping, duties, storage, and any platform or payment fees.
What you’ll need: Costing spreadsheet, retail vs. wholesale margin calculator, competitor pricing research
Common mistake: Pricing based on what feels “fair” or what competitors charge, without knowing your actual cost basis. If your COGS is $28 and you retail at $60, your margin is 53% — fine for direct-to-consumer, but unsustainable if a wholesale buyer wants 50% off your retail price.
Checklist:
- ✓ Calculate full COGS (unit cost + trims + labels + shipping + duty + storage)
- ✓ Set a target wholesale margin (minimum 2.5× COGS for wholesale)
- ✓ Set a target retail margin (minimum 4–5× COGS for direct-to-consumer)
- ✓ Price each style and build a line sheet
- ✓ Model break-even at your first production run quantity
7. Set Up Your Business Legally & Financially — Protect Yourself Before You Sell
Business Step
This step is easy to procrastinate — and founders pay for that procrastination. Operating as a sole proprietor with no business entity, no business bank account, and no trademark protection is a liability in every direction.
What you’ll need: LLC filing (LegalZoom, ZenBusiness, or state filing portal), EIN from the IRS, business bank account, trademark application
Common mistake: Using a personal bank account for business transactions. It creates accounting nightmares, voids some business protections, and makes tax filing significantly more complicated.
Checklist:
- ✓ File your LLC (or appropriate entity) in your state
- ✓ Obtain your EIN (Employer Identification Number) from the IRS — it’s free and takes 10 minutes
- ✓ Open a dedicated business checking account
- ✓ Apply for a trademark on your brand name and logo (if budget allows)
- ✓ Purchase product liability insurance before your first sale
8. Build Your Brand Assets — Create the Visual Language Your Customers Will Remember
Design Step
Your brand assets are every visual touchpoint your customer encounters — your logo, care label, hangtag, packaging, and how your product is photographed and presented online. This is where your brand identity from Step 1 becomes tangible.
For labels and printed materials: 300 DPI is the minimum resolution for print-ready files. Anything less and your label artwork will print blurry — a detail that customers absolutely notice, even if they can’t articulate why.
What you’ll need: Logo files (vector + raster), clothing mockup templates, hangtag and label design, packaging concepts
Common mistake: Designing assets in low resolution or without bleed marks, then discovering print errors after files are submitted. Always request a print proof before approving any label or packaging.
Checklist:
- ✓ Finalize logo in vector format (AI or EPS) — minimum for scalability
- ✓ Design woven or printed care labels with required compliance info
- ✓ Create hangtag design (front brand identity, back care/country info)
- ✓ Design product packaging (polybag, box, or mailer — depending on channel)
- ✓ Create product mockups for website and social media
Clothing mockup templates for brand assets — The Starter Bundle includes professional mockup templates used by 2,400+ independent designers. All files come with a full commercial license and lifetime access — no subscription required.
For more guidance on choosing and using garment mockups, see our guide to the best clothing mockups for fashion designers.
9. Place Your First Production Order — Make It Official
Production Step
Once your sample is approved and your costs are confirmed, it’s time to commit. Your production order is a legal document — treat it like one. A well-structured purchase order protects you if delivery timelines slip or quality standards aren’t met.
What you’ll need: Purchase order template, deposit wire confirmation, production timeline agreement, quality control checklist
Common mistake: Placing a verbal order or relying on email threads as your only documentation. If a dispute arises, you need a signed PO with clear specs, quantities, pricing, and delivery dates.
Checklist:
- ✓ Issue a formal Purchase Order (PO) with style numbers, quantities per size/color, unit price, and delivery date
- ✓ Confirm your deposit amount (typically 30–50% upfront, 50–70% on completion)
- ✓ Agree on inspection terms (in-factory QC or third-party inspection)
- ✓ Set up a production timeline with milestone check-ins
- ✓ Confirm payment method and currency (wire transfer, Alibaba Trade Assurance, etc.)
- 10. Launch & Market Your Collection — Build Demand Before Day One
Business Step
The launch itself is not a single moment — it’s a 4–6 week campaign that begins well before your goods arrive. Pre-launch marketing builds the audience, the anticipation, and the demand that converts your first production run into actual revenue.
What you’ll need: Email list platform (Klaviyo, Mailchimp), social media content calendar, photography plan, wholesale or DTC platform (Faire, Shopify, or your own e-commerce)
Common mistake: Waiting until goods are in hand to start marketing. By then, you’ve lost weeks of awareness-building. The brands that sell out on drop day started building their audience 60–90 days before launch.
Checklist:
- ✓ Set up your e-commerce platform (Shopify, WooCommerce, or Faire for wholesale)
- ✓ Plan a pre-launch campaign: countdown, behind-the-scenes content, waitlist
- ✓ Book a product photography shoot (lifestyle + flat lay)
- ✓ Build your email list before launch (even 200 engaged subscribers makes a measurable difference)
- ✓ Prepare your launch-day email sequence and social content calendar
💡Pro Tip: Build your email list before you launch. Even 200 warm subscribers can make or break a first-run sell-through. An email list converts at 3–5× the rate of social media posts — it’s the highest-ROI channel for new brands, and it’s yours to keep.
How to Prioritize Your Checklist Based on Your Stage
Not every founder starts at the same point. Here’s how to use your clothing brand launch checklist depending on where you are right now:
Pre-Launch (Idea Stage — No Designs Yet)
You’re still sketching and researching. Start at Step 1 and work forward in sequence. Don’t rush to Step 3 — a tech pack built on an unclear brand identity will need to be rebuilt.
- Focus on: Steps 1, 2, 7 (get legal early — it takes longer than you think)
- Tools: Notion for planning, Pinterest for research, Google Sheets for costing
Design-Ready (Sketches Done — No Factory Yet)
You have your concept and initial designs but haven’t contacted manufacturers. Your immediate priority is Step 3.
- Focus on: Steps 3, 4, 6
- Next milestone: Send your first manufacturer inquiry with a completed tech pack
Production-Ready (Factory Sourced — Needs Documents)
You’ve identified a factory and they’re ready to move. Get your documentation in order immediately.
- Focus on: Steps 3 (finalize tech pack), 5 (sample approval), 9 (PO issuance)
- “If you already have a manufacturer lined up, jump to Step 5.”
Relaunch (Existing Brand — Scaling Up)
You’ve done one production run and you’re ready to grow. Your checklist focus shifts from setup to systems.
Focus on: Steps 6 (refine costing for new volume), 9 (PO management at scale), 10 (wholesale expansion via Faire)
Consider: Moving from Starter Bundle to Techpack Mega Bundle for more complex styles and graded size runs
Frequently Asked Questions
What is a clothing brand launch checklist?
A clothing brand launch checklist is a step-by-step planning document that covers every major milestone between your initial brand concept and your first product hitting customers’ hands. It typically includes brand identity development, design and tech pack creation, manufacturer sourcing, sampling, costing, legal setup, brand asset creation, production ordering, and launch marketing. Using one helps founders stay organized, avoid costly mistakes, and move through the process with clarity rather than guesswork.
How long does it take to launch a clothing brand from scratch?
Realistically, 6 to 18 months from first sketch to first sale — and most founders land closer to 12 months on their first run. Key bottlenecks include factory lead times (8–16 weeks for production after sample approval), sampling rounds (2–4 weeks per round), and legal setup (2–6 weeks for LLC and trademark). Founders who have professional documentation ready — including a complete tech pack — consistently move faster through the factory communication and sampling stages.
Do I need a tech pack before contacting manufacturers?
Yes — and most serious factories will ask for one before they respond with a quote. A tech pack tells the factory exactly what you want to build: measurements, construction details, materials, and finishes. Without it, factories either quote inaccurately (leading to cost surprises later) or decline to respond at all. If you don’t have one yet, the Techpack Mega Bundle gives you a complete, factory-accepted template suite — the fastest way to get production-ready documentation in place.
How much does it cost to launch a clothing brand?
It depends on scale, but here are realistic ranges:
- Micro launch (50–100 units, 1–2 styles): $5,000–$15,000
- Small launch (150–300 units, 3–5 styles): $15,000–$40,000
- Mid-size launch (500+ units, full collection): $40,000–$100,000+
What drives costs up: high MOQs, domestic manufacturing, multiple sampling rounds, premium materials, and complex construction. What brings costs down: overseas manufacturing, simple silhouettes, print-on-demand for lower-risk styles, and reusing tech pack templates across similar styles.
What is a MOQ and how does it affect my first production run?
MOQ stands for Minimum Order Quantity — the fewest units a factory will produce in a single run. MOQs vary widely: some small domestic manufacturers work with as few as 25–50 units per style, while overseas factories often require 100–500 units per style, per colorway. For your first run, MOQ is one of the most important vetting criteria. If a factory’s MOQ exceeds your budget or risk tolerance, keep searching — there are factories that specialize in small-run production for emerging brands. Don’t let a factory’s MOQ pressure you into ordering more than you can realistically sell.
Can I launch a clothing brand without a factory (POD route)?
Yes, and for some founders it makes complete sense. Print-on-demand (POD) platforms like Printful or Printify let you sell custom-designed products with no inventory, no MOQ, and no upfront production cost — the product is manufactured only when a customer orders it. The trade-off: unit costs are higher (limiting your margin), you have less control over quality and construction, and you’re limited to the blanks and printing methods the platform offers. POD is ideal for testing designs, validating demand, or running a side project without significant capital. For a brand built on signature construction or premium quality, private label manufacturing with your own factory gives you far greater control.
What documents do I need for my first production run?
At minimum, you’ll need:
- Tech pack — your primary production document
- Purchase order (PO) — the legal document confirming quantities, pricing, and delivery terms
- Sample approval sheet — documenting which sample version was approved as the production standard
- Quality control checklist — specifying what inspectors should check during and after production
The Starter Bundle from S.i. Graphics includes professionally formatted templates for your tech pack and brand assets — everything you need to show up ready on your first factory call.
How do I find a reliable clothing manufacturer?
Start with reputable sourcing platforms: Maker’s Row for US-based manufacturers, Sewport for global vetted factories, and Alibaba (with careful vetting) for overseas options. Once you have candidates, vet them with these questions: What is your MOQ? What’s your average lead time from sample approval to delivery? Can you share references from brands you’ve worked with? Do you have GOTS or OEKO-TEX certification? Red flags: factories that don’t ask for a tech pack, demand 100% payment upfront, or can’t provide samples of previous work.
Browse manufacturer profiles on Maker’s Row
What’s the difference between a tech pack and a mood board?
A mood board is a visual reference tool — it captures the aesthetic, feel, and inspiration behind your collection. It’s for internal alignment and creative direction. A tech pack is a production document — it tells a factory exactly how to build your garment, with measurements, materials, construction specs, and label placements. Factories cannot work from a mood board. They need a tech pack. You need both, but for different purposes and at different stages.
How do I price my clothing line for profit?
Start with your full COGS (unit cost + trims + labels + freight + duty), then apply your target multipliers:
- Wholesale price: 2.5–3× COGS
- Retail price: 5–6× COGS (or 2× your wholesale price)
If the retail price your math produces is significantly above what customers in your niche pay, you need to reduce your COGS — not squeeze your margin. Common COGS-reduction levers include: ordering higher quantities, simplifying construction details, or switching to a lower-cost fabric with similar hand feel.
Conclusion
Now you have a complete clothing brand launch checklist to take your idea from concept to first production run. Don’t let the scale of the process slow you down — every brand you admire went through every one of these steps. The difference between the ones that made it and the ones that didn’t often comes down to one thing: preparation.
Key takeaways:
- ✓ A structured clothing brand launch checklist prevents costly mistakes that sink most brands before launch
- ✓ Tech packs are non-negotiable — they’re the single most important document in your apparel brand startup steps
- ✓ Professional documentation (not DIY guesses) is what gets factories to respond, sample accurately, and produce consistently
- ✓ Build your audience before your goods arrive — sell-through starts with demand, not just supply
Ready to get started?
→ Get the Starter Bundle — Tech pack + mockup templates, 5.0-star rated, trusted by 2,400+ designers, full commercial license included
→ Get the Techpack Mega Bundle — The most complete production documentation suite for independent apparel brands. Lifetime access, no subscription.
Your brand deserves a strong foundation. You’ve done the research — now take the next step.