Design - Create - Grow

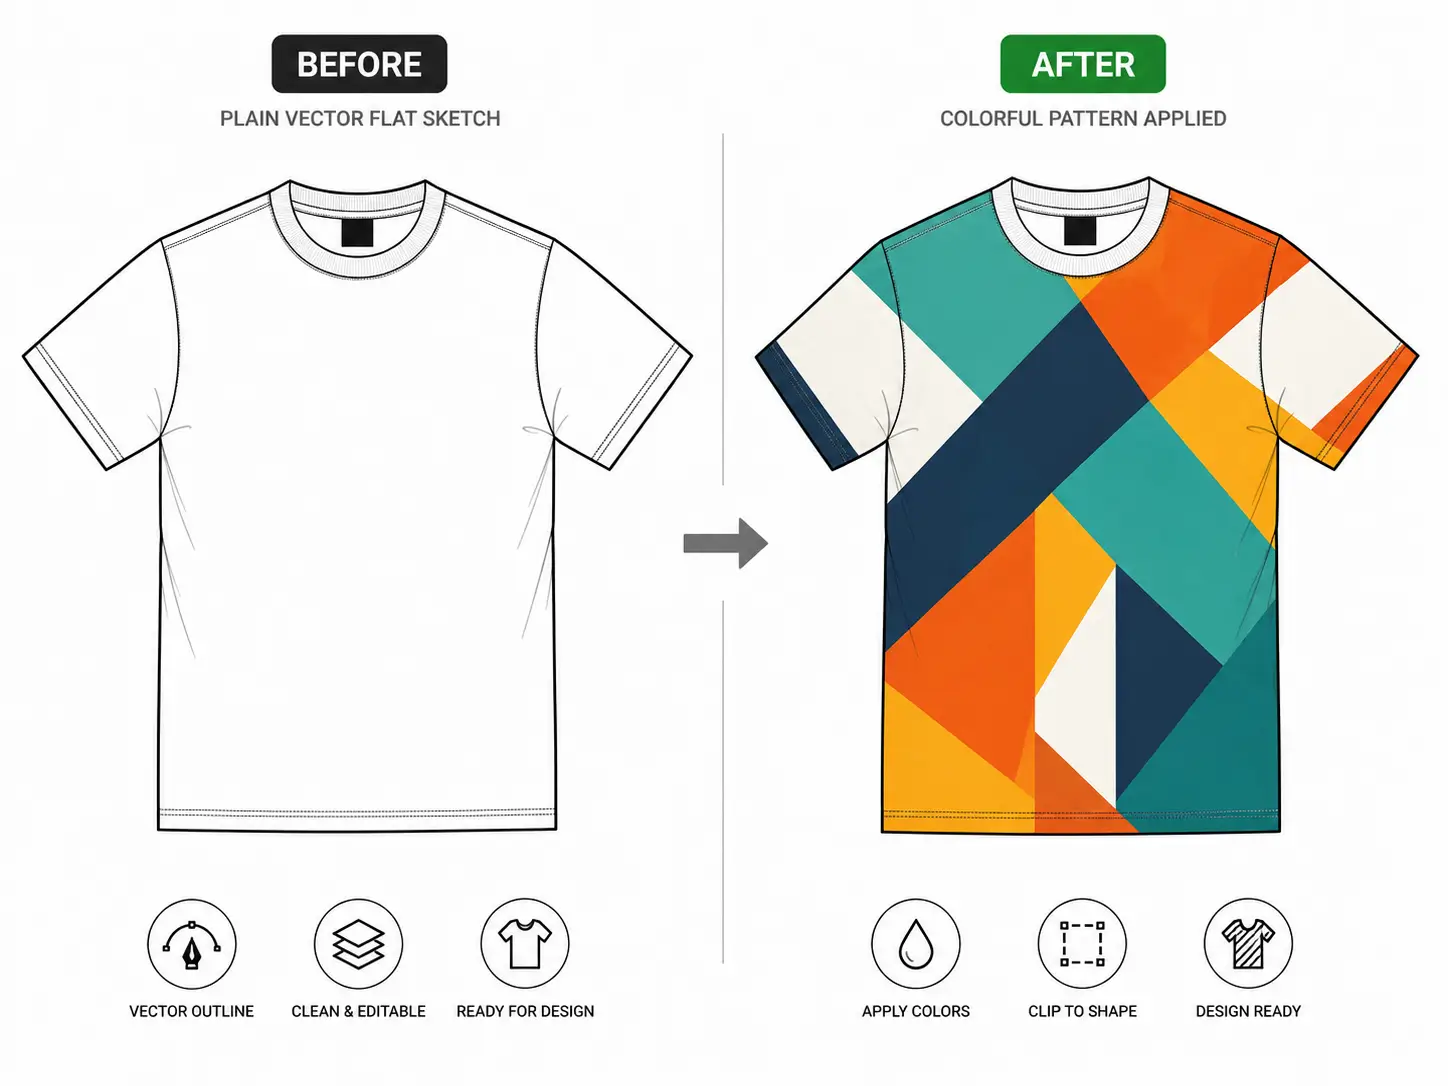

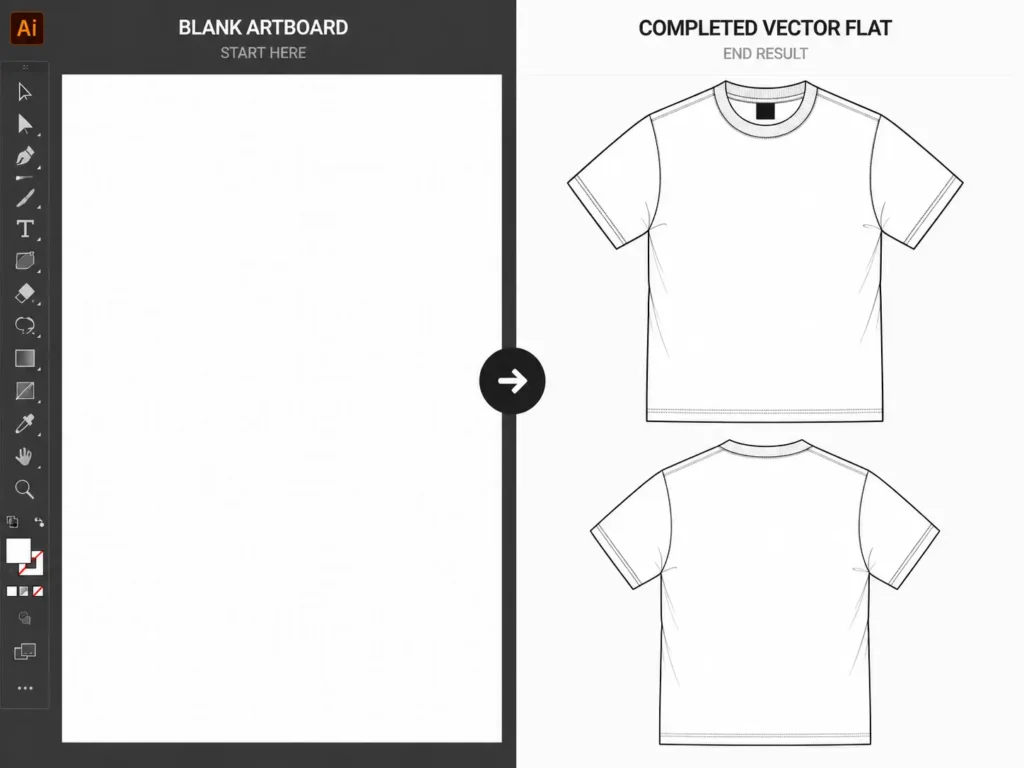
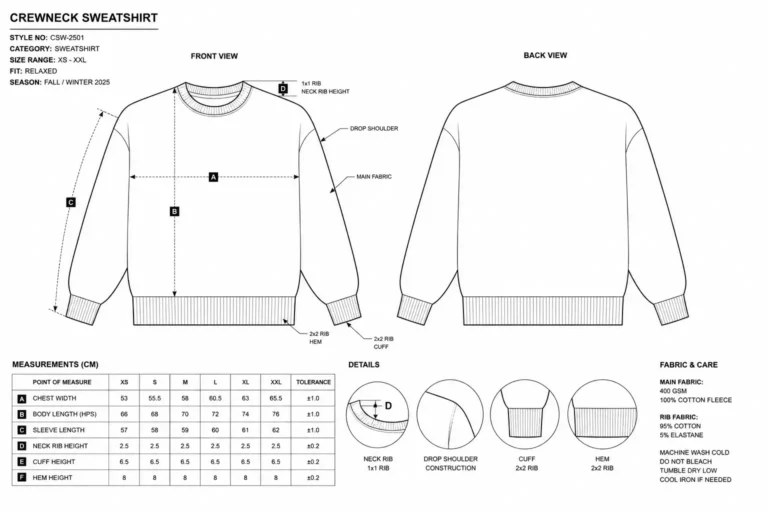
Struggling to figure out how to make a clothing mockup in Illustrator that actually looks professional? If you’re building out a collection, accurate vector flats aren’t just nice to have — they’re the industry-standard language manufacturers, pattern makers, and production teams speak fluently.
Starting from a blank artboard, though, can feel overwhelming when you’re not sure where the first anchor point should even go.
The good news is that learning how to make a clothing mockup in Illustrator is a skill you can pick up in an afternoon, even if you’ve never touched the Pen Tool before. In this tutorial, we’ll walk through setting up your workspace, tracing a garment from scratch using vector paths, adding seams, collars, patterns, and shading, and finally exporting a tech-pack-ready file your manufacturer will accept without a single revision request.
We’ll also be honest about something most tutorials gloss over: drawing accurate vector flats by hand takes real time. So, toward the end, we’ll show you the shortcut hundreds of designers already use to skip the repetitive parts entirely. Consider this your complete vector clothing mockup tutorial, from a blank artboard to a finished, tech-pack-ready file. Let’s get your artboard open.
⚡Quick Answer: To make a clothing mockup in Illustrator, set up your artboard, use the Pen Tool to trace your garment’s silhouette, add stitch details with dashed strokes, and use clipping masks to drop in colors or patterns. Short on time? Skip the manual drawing and grab our Vector Clothing Mockups Mega Bundle instead.
Table of Contents
Why Use Adobe Illustrator for Apparel Mockups?
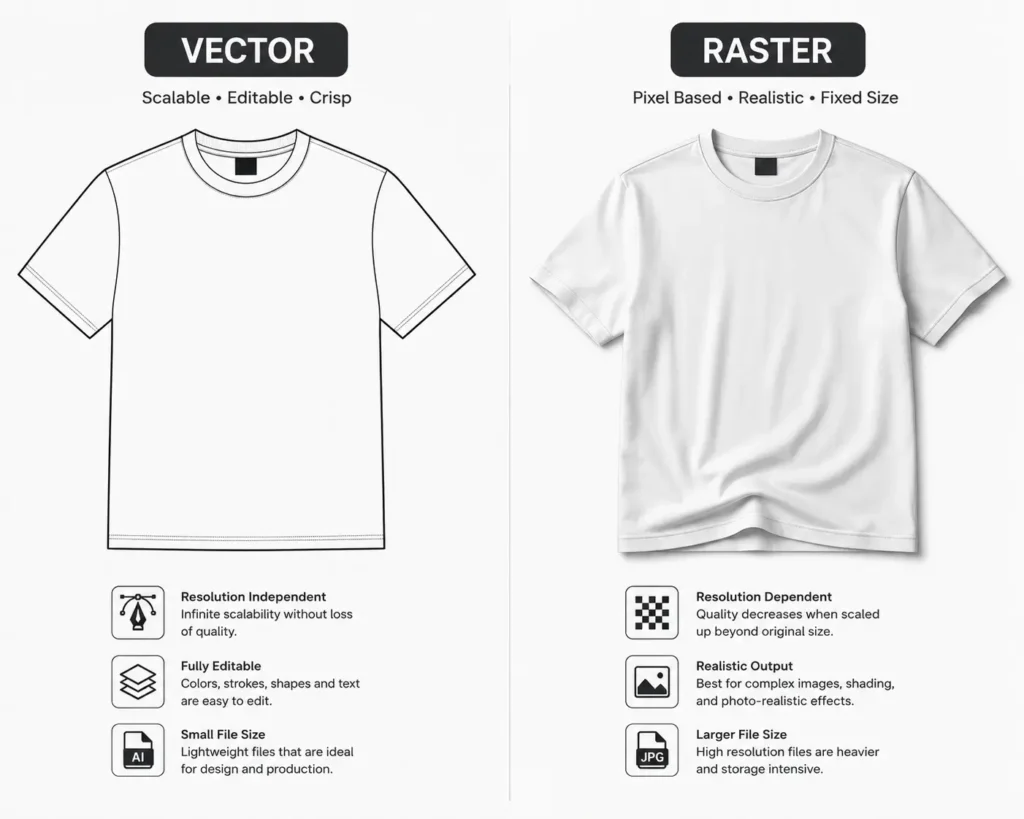
Before we dive into the tutorial, it helps to understand why vector software is the go-to choice for this kind of work. This Illustrator apparel mockup guide exists because vector and raster files solve two completely different problems and mixing them up costs designers real time and money. If you only remember one thing from this Illustrator apparel mockup guide, make it this: vector paths are what manufacturers actually ask for.
Photoshop (raster) is built for realistic marketing imagery — lifestyle shots, textured renders, social media content. Every image is made of pixels, which means it gets blurry the larger you scale it.
Illustrator (vector), on the other hand, is built on mathematical vector paths. That’s exactly why it’s the standard for technical apparel design. A few reasons manufacturers specifically request vector flats over raster mockups:
- Infinite scalability — a flat sketch can go from a business card to a billboard with zero quality loss
- Crisp, clean lines — critical for showing exact seam placement and stitch detail
- Instant recoloring — swap a colorway in seconds using Global Swatches instead of redrawing
- Technical accuracy — pattern makers can read proportions precisely, which raster images can’t guarantee
- Small file sizes — easy to email, embed in tech packs, or print at any scale
If you’re serious about apparel design, vector flats aren’t optional — they’re the foundation of every tech pack you’ll ever submit.
If you’re deciding between Vector and PSD before starting your project, see our complete guide to the best clothing mockups for fashion designers for a side-by-side comparison.
Setting Up Your Illustrator Workspace
A little prep now saves you a lot of cleanup later. Before you draw a single line, get your workspace organized.
Document Setup:
- Create a new artboard sized around 8.5 x 11 in (or A4) if this will live inside a tech pack
- Set your color mode to CMYK if the file is headed to print, or RGB if it’s staying digital
- Save your file as an Adobe Illustrator CC document so version compatibility isn’t an issue later
Tools to Activate: Pull up your Pen Tool (P), Direct Selection Tool (A), Pathfinder Panel, and Layers Panel before you start. You’ll be switching between these constantly.
Reference Image: Import a base reference photo or a hand sketch (File > Place) and drop its opacity down to around 30-40%. Lock that layer immediately — nothing derails a tutorial faster than accidentally dragging your reference photo mid-trace.
💡 Pro Tip: Create a separate layer for every major element — silhouette, seams, shading, graphics. Future-you will thank present-you when a client asks for “just the collar changed.”
Step-by-Step Tutorial: The Manual Way
This is the core of any vector clothing mockup tutorial — the actual hands-on process of building your flat from a blank artboard. If you’re looking for the exact steps on how to make a clothing mockup in Illustrator, this is where the real work happens. Grab your reference image, and let’s get into it.
Step 1: Outline the Base Silhouette Using the Pen Tool
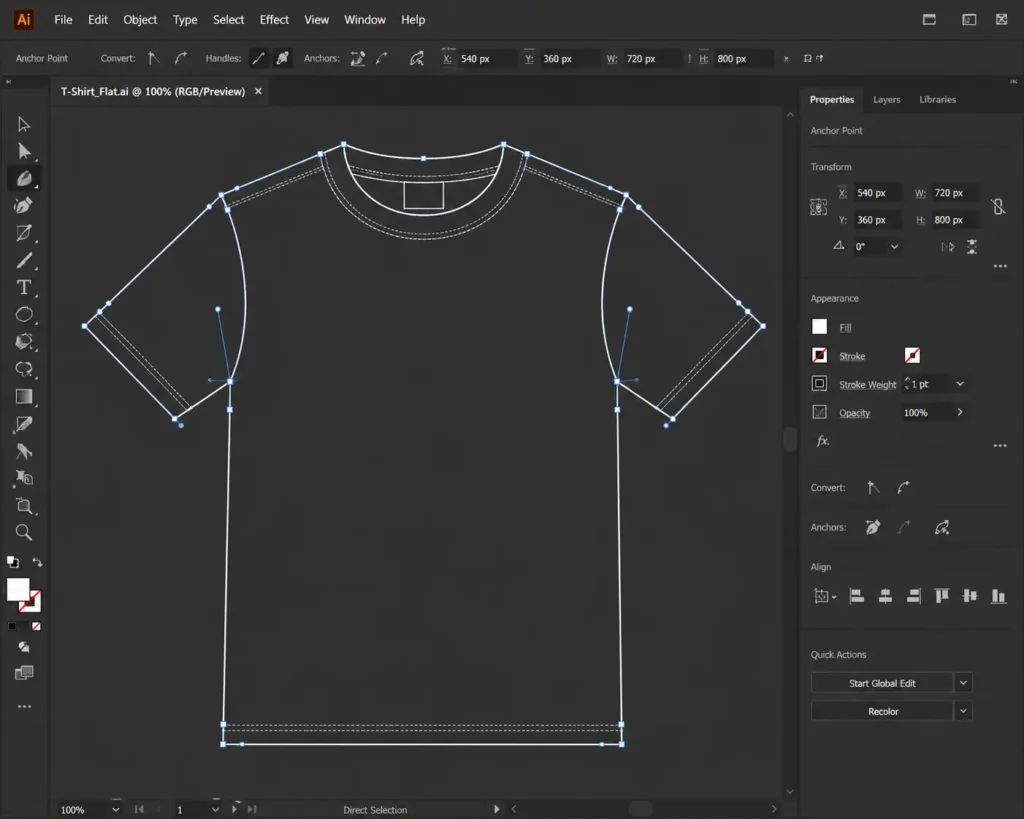
Select the Pen Tool (P) and start clicking along the outer edge of your reference garment, front view first. Click for straight lines, and click-drag for curves — this pulls out Bezier handles you can adjust to match the fabric’s natural drape.
Work slowly around shoulders, sleeves, and the hem. Close the path by clicking back on your starting anchor point. Repeat for the back view on a separate layer once the front is locked in.
💡 Pro Tip: Hold Shift while clicking to keep lines perfectly horizontal or vertical — huge for straight side seams.
Step 2: Adding Structural Seams and Stitches
With your silhouette closed, switch to the Direct Selection Tool (A) and trace along the interior lines where seams actually fall — shoulder seams, side seams, sleeve attachments. Use the Pen Tool again for each seam line.
In the Stroke Panel, set these to a dashed stroke at a thin weight (around 0.5-1pt) to visually represent stitching without overpowering the silhouette.
Step 3: Creating Necklines, Collars, and Hems
Necklines and collars need their own closed paths, layered on top of the base silhouette. Draw the collar shape, then use the Pathfinder Panel’s Unite or Minus Front functions to blend it cleanly into the neckline rather than leaving overlapping paths.
Hems typically get a simple double-stitch line — two thin, parallel dashed strokes about 2-3px apart.
Step 4: Using Clipping Masks for Patterns or Textures
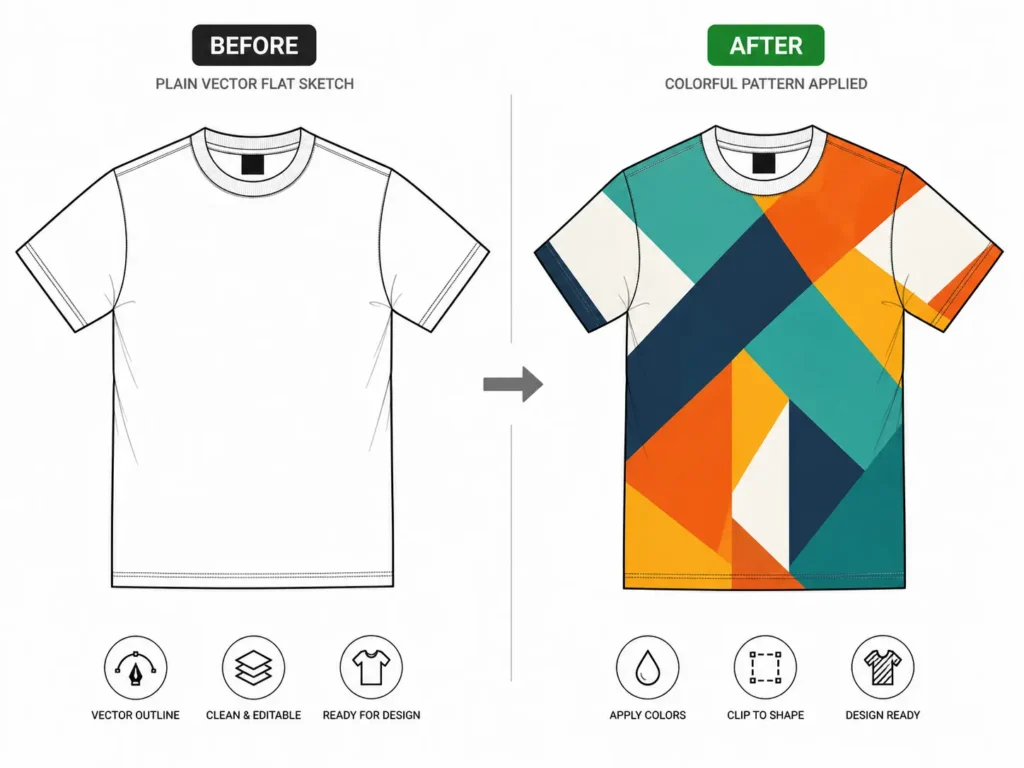
To drop a print or texture into a specific garment panel, place your pattern artwork on its own layer above the silhouette. Select both the pattern and the shape you want it confined to, then go to Object > Clipping Mask > Make.
This crops the pattern precisely to the garment panel without permanently deleting any pixels, so you can always swap the pattern later.
Step 5: Adding Highlights and Shadows for Dimension
Flat vector mockups can look one-dimensional without a little shading. Draw simple shape overlays along natural fold lines (underarms, waist gathers) and set their opacity down to 15-25% using black for shadows and white for highlights.
Keep these subtle — the goal is dimension, not a fully rendered illustration.
Step 6: Dropping In Your Logo or Graphic Design
Use File > Place to import your logo file directly onto the garment layer. Scale and position it to match realistic proportions — most chest logos sit roughly 3-4 inches below the collar on a standard tee.
If the garment has curvature (like a fitted silhouette), use Envelope Distort > Make with Warp to bend the graphic slightly so it follows the fabric’s shape instead of sitting flat and unrealistic.
Step 7: Formatting the Vector File for a Tech Pack
Once your flat is complete, clean up your Layers Panel — rename every layer clearly (Silhouette, Seams, Collar, Print, Logo) so anyone opening the file understands the structure instantly.
Save a working .AI file for future edits, then export a flattened, high-resolution PDF or EPS for your tech pack. This is the format most manufacturers expect to receive.
At this point, you officially know how to make a clothing mockup in Illustrator from a completely blank artboard — front, back, seams, print, and all. That’s the full manual vector clothing mockup tutorial from start to finish.
The Fast Route: Using Pre-Made Vector Mockups
Here’s the part most tutorials won’t tell you upfront: the process you just learned typically takes 1-3 hours per garment, once you factor in reference tracing, seam placement, shading, and file cleanup. Multiply that across an entire collection, and you’re looking at days of work before you’ve even started your actual designs.
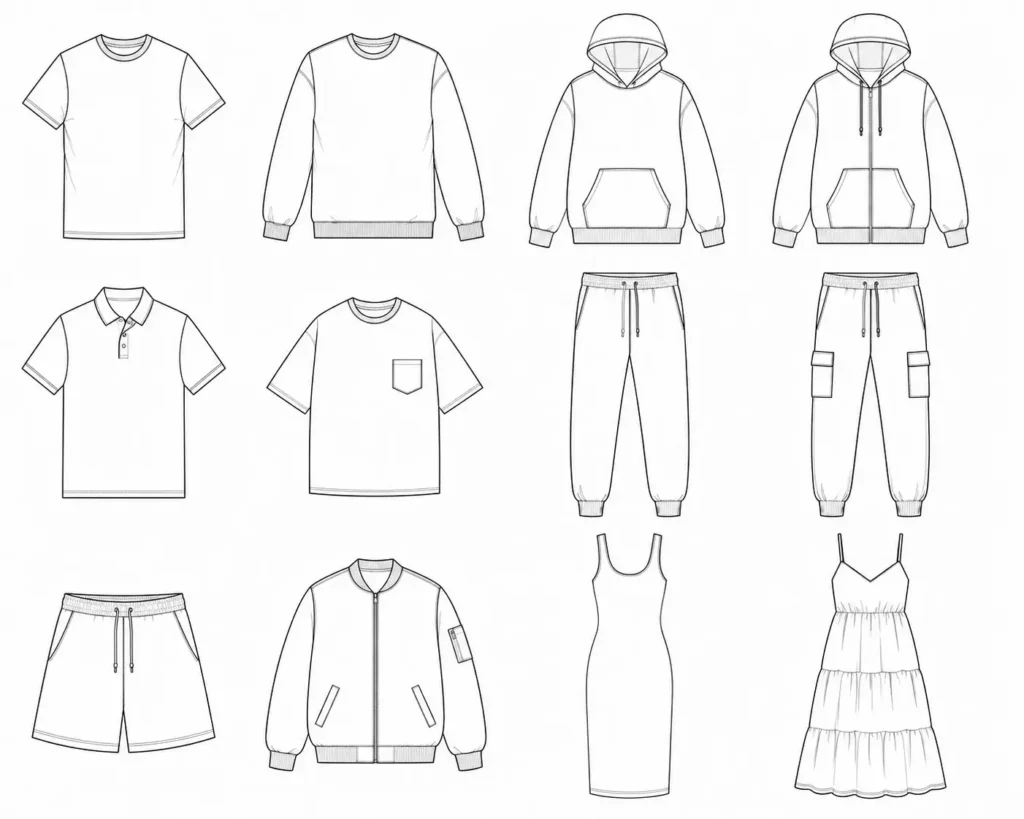
That’s exactly why we built the S.i. Graphics Complete Vector Mockup Library. Instead of drawing every silhouette from scratch, you get hundreds of pre-drawn, highly accurate vector garments — tees, hoodies, joggers, dresses, and more — ready to drop your own graphics, colors, and branding into immediately.
Every file is:
- Fully editable in Adobe Illustrator CC using standard layers and Global Swatches
- Tech-pack ready, formatted the same way manufacturers expect
- Cleared for commercial use, so you can use them across client work or your own brand
Pair the Library with the S.i. Graphics Adobe Illustrator Tech Pack Template, and you’ve got a completely seamless workflow — drop your mockup straight into a pre-built tech pack layout, add your measurements and specs, and export something manufacturer-ready in minutes instead of hours.
Doing It From Scratch vs. Using the Mega Library:
- From Scratch: Full creative control over every line, but 1-3 hours per garment and a real Pen Tool learning curve
- Mega Library: Professional, accurate vectors in minutes, ready to customize with your own colors, prints, and logos
Neither approach is “wrong” — plenty of designers genuinely enjoy hand-drawing every flat. But if you’re racing a production deadline or managing a full seasonal collection, the Mega Bundle exists so speed doesn’t have to cost you accuracy.
| Feature | DIY Manual Method | Vector Mockups Mega Library |
|---|---|---|
| Time to Create | 1-3 Hours per garment | 5 Minutes |
| Skill Level Required | Intermediate-Advanced Pen Tool skills | Beginner-friendly |
| Accuracy | Depends on skill/reference quality | Professionally pre-drawn |
| Cost | Free (just your time) | $64.99 for hundreds of garments |
| Tech Pack Ready | Requires manual formatting | Yes, out of the box |
Frequently Asked Questions
Is Illustrator or Photoshop better for clothing mockups?
For tech packs and manufacturer submissions, Illustrator wins because vector paths stay crisp at any size and are easy to edit. Photoshop is better suited for realistic marketing visuals, like lifestyle photos or textured product renders where you’re not sending files to a factory. This is really the core question behind any Illustrator apparel mockup guide worth reading.
How do I easily change the color of my vector mockup?
Set up Global Swatches in the Swatches Panel when you first build your flat. Once a fill is assigned as a Global Color, updating that one swatch instantly updates every shape using it. Use the Direct Selection Tool (A) if you need to isolate and recolor a single panel instead.
Can I use vector mockups for my manufacturer’s tech pack?
Yes — vector is actually the industry standard for tech packs, not just an acceptable option. [LINK: “download our Adobe Illustrator Tech Pack Template” → sigraphics.co/products/tech-pack-template] to drop your finished mockup straight into a manufacturer-ready layout.
What if I’m a beginner and can’t use the Pen Tool well?
Honestly, the Pen Tool takes practice — most designers wrestle with it for weeks before it clicks. Keep practicing, but if you need professional results today, the Vector Clothing Mockups Library gives you accurate flats without the learning curve.
How do I apply a repeating pattern to my garment sketch?
Place your pattern artwork above your garment shape, select both, then use Object > Clipping Mask > Make. You can also save patterns as Pattern Swatches and apply them directly as a fill for a true repeating effect.
What resolution or file format should I save my Illustrator mockup in?
Save your working file as .AI, then export a flattened .EPS or high-resolution .PDF for manufacturers. These formats preserve vector paths at any print size, which is exactly what most factories require.
How long does it take to create a vector clothing mockup from scratch?
Honestly? For beginners, expect 1-3 hours per garment, sometimes longer for complex silhouettes with prints or paneling. That time investment is exactly why so many designers lean on pre-made templates for anything beyond a one-off design.
How do I add my custom graphics to the Illustrator mockup?
Use File > Place to import your artwork onto its own layer, then scale and position it over the garment. For fitted areas with curvature, Envelope Distort > Make with Warp helps the graphic follow the fabric’s shape realistically.
Conclusion
Now you know exactly how to make a clothing mockup in Illustrator — from a blank artboard all the way to a manufacturer-ready file. Whether you draw every stitch by hand or lean on pre-made assets, mastering vector flats is a non-negotiable skill for serious apparel design.
Key takeaways:
- Vector beats raster for anything headed to a manufacturer — it stays crisp at any size
- The Pen Tool, clipping masks, and Global Swatches are your three best friends in this workflow
- Manual flats are genuinely valuable to learn, but they cost 1-3 hours per garment
- Speed matters when you’re managing a real collection or a client deadline
Ready to skip the hours of drawing?
Download the Complete Vector Mockup Library
Grab the Adobe Illustrator Tech Pack Template
Your manufacturers are waiting for professional flats. Start designing today!