Design - Create - Grow


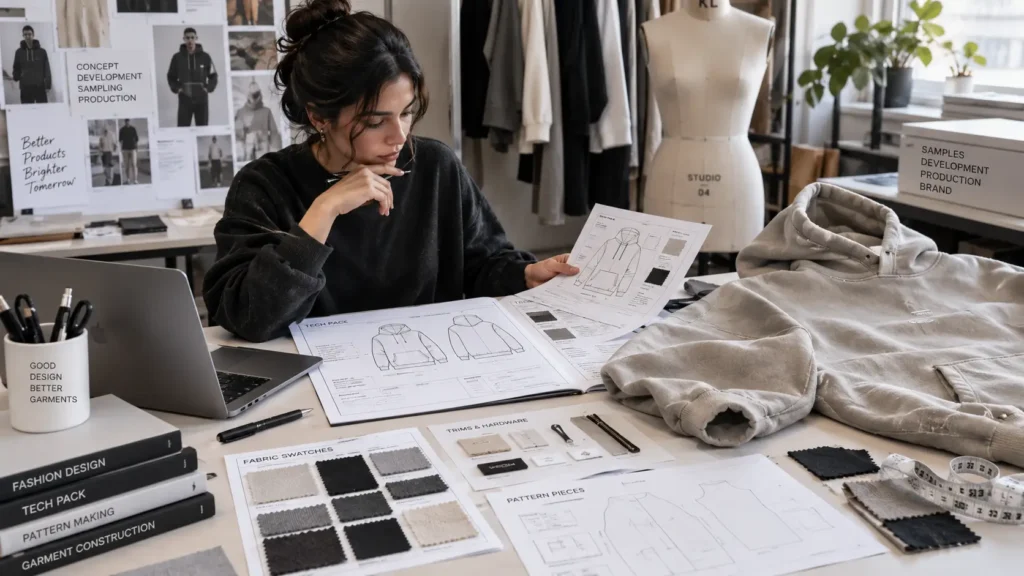
A finished tech pack often feels like the finish line. You’ve documented every measurement, construction detail, and material spec, and you’re ready to see the garment for real. But going from tech pack to sample isn’t a single step — it’s the start of a development process that involves document review, sourcing, pattern work, and physical construction before a garment ever reaches your hands.
This article picks up where a finished tech pack leaves off. If you haven’t built one yet, What Is a Tech Pack covers that groundwork. Here, the focus is what a manufacturer, sample room, or development team typically does with your documentation — and where things commonly go sideways before the first sample is complete.
Exactly how this unfolds depends on the manufacturer, the garment category, your sourcing arrangement, and how your production setup is structured.
There’s no single universal path, but the general sequence — document review, material and trim confirmation, pattern development, sample construction, review, and revision — shows up in some form across most apparel development.
Quick answer: The tech pack to sample process is the transition from documented garment specifications to a physical sample. A manufacturer may first review the tech pack, confirm materials and construction details, develop or adjust the pattern, prepare the sample, and then work through fit and technical revisions before the garment is ready for production approval.
Table of Contents
What Happens After You Send a Tech Pack?
Once your tech pack reaches a factory, sample room, or technical designer, it typically moves through several stages before a physical garment exists. A simplified version of that path looks like this:
Tech Pack → Factory Review → Materials / Trims → Pattern Development → Sample Construction → Sample Review → Corrections → Next Development Stage
In practice, these stages often overlap. A pattern maker might start working while a sourcing question is still being resolved, or a sample room might flag a construction question mid-build rather than waiting for a formal review round. Different manufacturers assign these tasks to different people — sometimes one technical contact handles everything, and sometimes review, sourcing, patternmaking, and sewing are separate teams entirely.
The point isn’t that every factory follows an identical checklist; it’s that a tech pack typically triggers a review-and-development process rather than an immediate build.
Step 1 — The Manufacturer Reviews the Tech Pack
Before any cutting or sewing happens, someone — a merchandiser, technical designer, pattern maker, or sample room lead, depending on the factory — usually reviews the document itself. They’re checking whether the information is clear and complete enough to start development.
That review commonly looks at:
- Technical flats and style identification
- Construction notes and finishing details
- The bill of materials (BOM)
- Fabric specifications and trim information
- Measurement specifications and tolerances
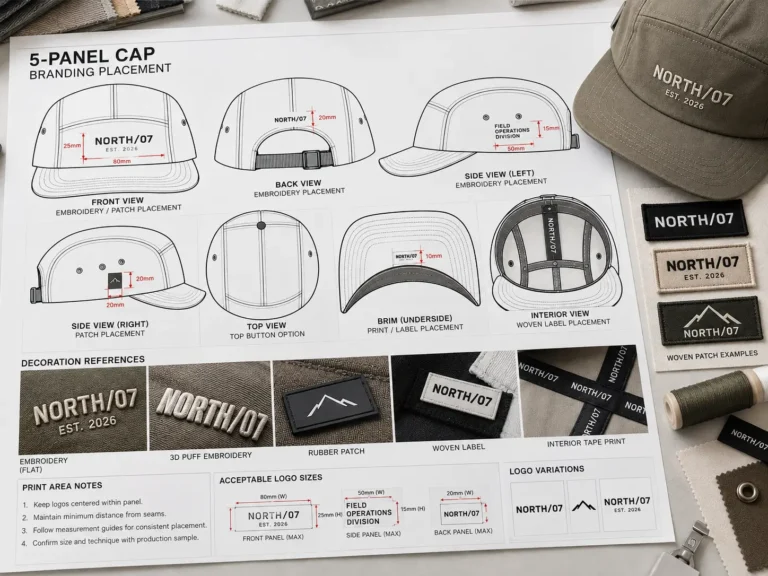
- Colorways and artwork placement
- Labels, branding, and packaging notes where relevant
- Reference images or existing patterns, if supplied
The goal at this stage isn’t approval — it’s feasibility. The reviewer is looking for gaps or contradictions before committing sample-room time and materials. Common reasons a factory comes back with questions include unclear construction sequencing, missing measurements, conflicting specs between sections of the document, materials that aren’t available in the quantity or form specified, ambiguous artwork placement, unspecified trims, or missing grading information for size ranges.
A tech pack reduces this back-and-forth, but it rarely eliminates it entirely — even a thorough document can prompt a clarifying question once someone with production experience looks at it closely. How to Communicate With Clothing Manufacturers goes deeper into handling that exchange, and How Factories Read Tech Packs covers how reviewers typically approach the document itself.
Step 2 — Materials and Trims Are Confirmed
Once the document has been reviewed, attention usually shifts to whether the specified materials are actually available for sampling. This includes the main fabric (weight, fiber content, construction, color, and any wash or finishing requirements), plus linings, ribbing, thread, zippers, buttons, drawcords, labels, and other trims.
Who handles this depends entirely on your arrangement. In some setups, the brand supplies fabric and trims directly. In others, the manufacturer or a sourcing agent sources everything, or responsibility is split by component. None of these is more “standard” than the others — it comes down to what’s agreed upfront.
Practical factors that affect this stage include stock availability, minimum order quantities, color matching, how much fabric a sample actually requires, lead times, and whether a specified material can be sourced at all in the region the factory operates in. When it can’t, substitutions get discussed — and it’s worth remembering that fabric behavior isn’t cosmetic.
Weight, drape, stretch, and shrinkage all affect how a pattern actually performs once it’s cut and sewn, so a substitution that seems minor on paper can shift fit and proportion in the finished sample.
Step 3 — The Pattern Is Developed or Adjusted
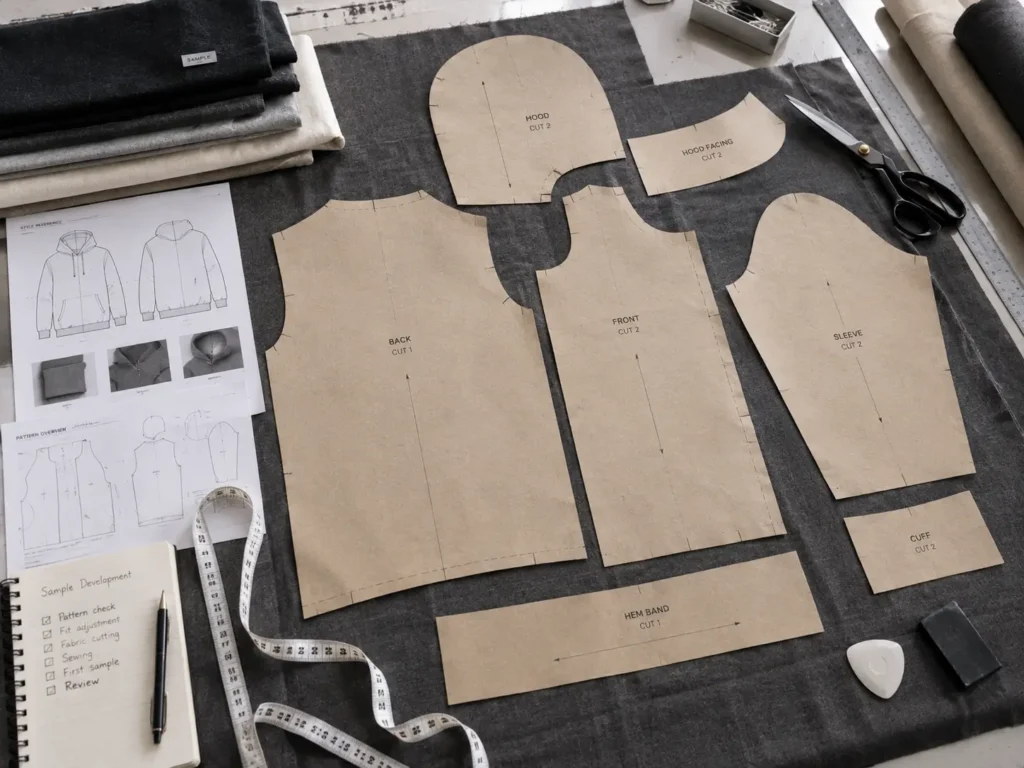
A technical flat communicates design intent — what the garment should look like and how it should be constructed. A pattern is what turns that intent into pieces that can actually be cut and assembled. This translation step is where a lot of the real technical work in sample development happens.
Pattern development covers seam placement, panel shapes, pocket construction, collars, cuffs, waistbands, rise, leg shape, sleeve shape, and overall fit balance. Depending on the manufacturer, this might mean building a pattern from scratch, modifying an existing block the factory already has for a similar silhouette, or working from a pattern the brand supplies directly. Some development relationships use an agreed base pattern that gets adjusted collaboratively.
There’s no single correct workflow here — it depends on the factory’s capabilities, the garment category, and what the brand is able to provide. A designer working from vector flats and clear specs generally gives a pattern maker a stronger starting point than a sketch alone, but the flat itself is never a substitute for the pattern.
Step 4 — The First Garment Sample Is Constructed
With a pattern and (typically) confirmed materials in place, the sample room prepares to build the physical garment. This generally involves fabric preparation, cutting, panel assembly, sewing, pressing, attaching trims and closures, applying labels, finishing, and — where relevant — applying artwork through print, embroidery, or another decoration method.
Sample-room work usually prioritizes problem-solving over line efficiency. A sample sewer may need to stop, re-check a measurement against the spec sheet, or flag something that doesn’t sit right before continuing — which is different from a production line built for repeatable speed. The purpose of this stage is to make the garment tangible enough that its fit, construction, proportions, materials, and finishing can actually be evaluated in person, not just imagined from a flat.
What Is Included in a Fashion Tech Pack breaks down the specific document sections sample rooms typically reference during construction.
Build an Editable Tech Pack for Sample Development
If you create technical flats and apparel specifications in Adobe Illustrator, the Adobe Illustrator Tech Pack Template can provide a structured starting point for organizing your documentation before sending a style for sample development.
What Is the First Garment Sample Actually Used For?
Once it exists, the first sample becomes a working reference, not a finished product. Teams typically use it to check overall silhouette, evaluate fit, review proportions, confirm construction methods, check pocket and closure placement, assess how the fabric actually behaves on the body, inspect trims, review artwork placement, and catch specifications that were missing or conflicting in the original document.
This is worth sitting with: a first sample is a development tool. It’s not automatically the final production standard, and treating it that way early on tends to create confusion later when revisions are still needed. Some issues — how a fabric drapes, whether a proportion reads correctly on a real body, whether a construction method holds up — are genuinely hard to fully judge from a flat sketch or a digital mockup alone. That’s a large part of why physical sampling remains a standard step even with strong digital documentation.
Tech Pack vs. Physical Sample: What Each One Communicates
No single artifact in apparel development — document, pattern, or sample — communicates everything on its own. Each one carries part of the picture.
| Item | Primary purpose | What it communicates | What it cannot fully communicate |
|---|---|---|---|
| Tech pack | Document design intent and specifications | Measurements, construction notes, BOM, artwork placement | How the garment actually fits or moves |
| Technical flat | Illustrate garment design | Silhouette, seam lines, proportions | Fabric behavior, real-world drape |
| Measurement specification | Define target dimensions | Points of measure, tolerances | Fit balance across a real body |
| BOM | List materials and trims | Fabric, trims, components, quantities | Actual handfeel, color accuracy, or availability |
| Pattern | Translate design into cuttable pieces | Panel shapes, seam allowances, construction sequence | How the pieces behave once sewn and worn |
| Physical sample | Evaluate the garment in real form | Fit, construction, material behavior, proportion | Whether it exactly matches bulk-production materials |
| Approved sample | Establish a development reference | Confirmed fit and construction at that stage | Guaranteed consistency across every future production unit |
What Gets Checked During the First Sample Review?
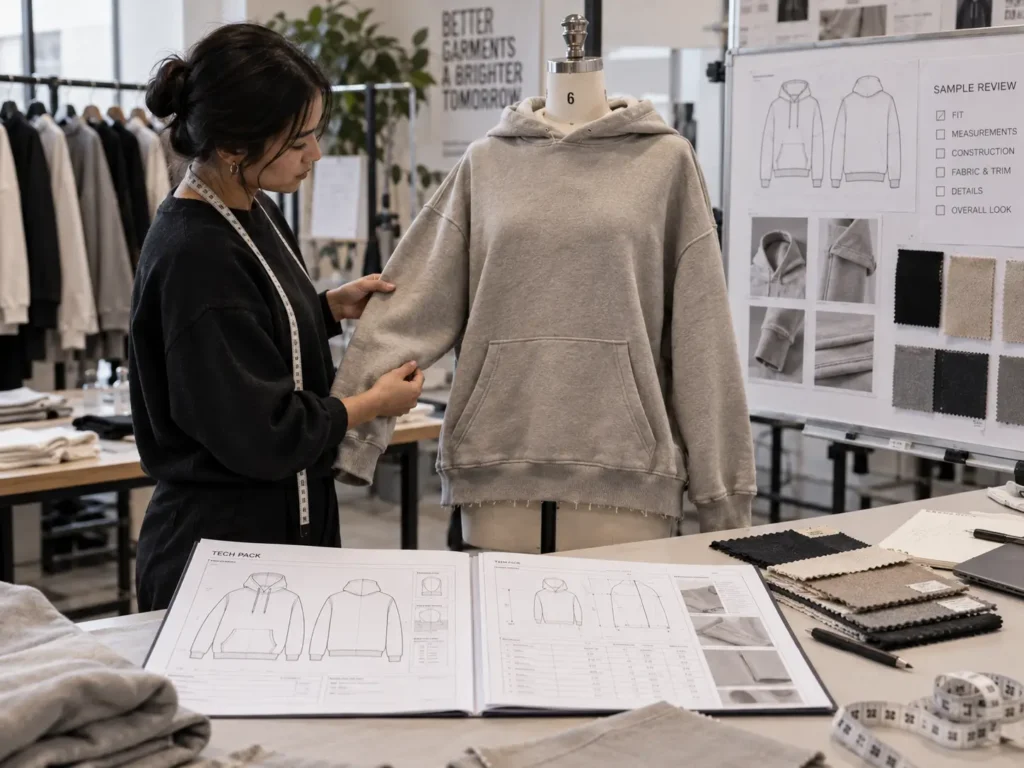
Fit and Measurements
Reviewers typically compare finished measurements — length, chest, waist, hip, sleeve, shoulder, rise, inseam, and opening measurements — against the original spec sheet, along with proportion and overall fit balance. Where tolerances were defined in the tech pack, this is the stage where they get tested against a real garment rather than a number on paper.
Construction
This covers seams, stitching, hems, panel assembly, pocket construction, closures, reinforcement points, collars, cuffs, elastic, and drawcords. The question being asked is whether the physical garment actually reflects the construction method documented in the tech pack, or whether something got interpreted differently in the sample room.
Materials and Trims
Handfeel, weight, color accuracy, stretch, and — where relevant — shrinkage or wash behavior all get evaluated here, along with trim quality and placement. It’s common for a spec that looked right on a swatch card to need a small refinement once it’s behaving as part of a full garment.
Artwork and Branding
This includes placement, scale, print or embroidery method, appliqué, label position, and color accuracy. There’s a meaningful difference between a placement measurement on a technical flat and how that same placement actually reads on a finished garment — which is often exactly what this review step is checking.
What Happens When the First Sample Is Not Right?
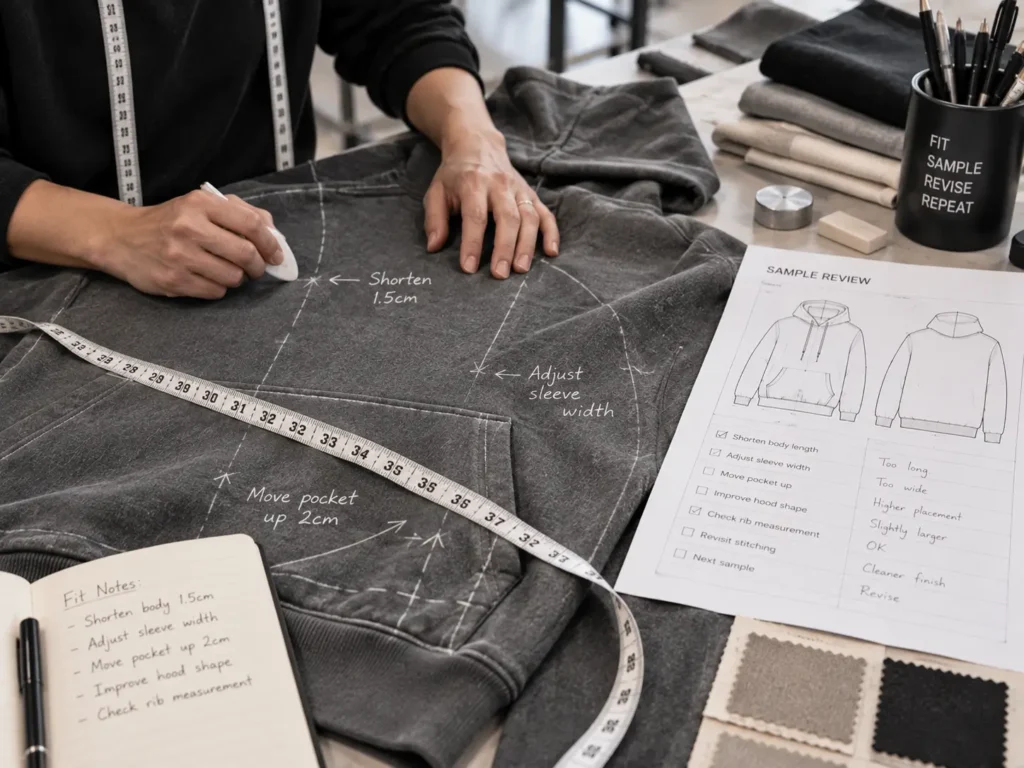
Needing revisions after the first sample is a normal part of development, not a sign that the tech pack failed or the manufacturer made a mistake. Common areas that get revised include fit, measurements, pattern shape, sleeve or leg proportion, fabric choice, construction method, trim selection, artwork placement, label position, and finishing.
Clear sample comments make this round more productive. A practical framework for documenting feedback includes:
- Problem — what’s wrong, described specifically
- Desired change — what should happen instead
- Reference measurement — the target number, if applicable
- Visual reference — a photo or marked-up flat, where useful
- Priority — critical fix vs. minor preference
- Revision date/version — so everyone is working from the current round
Documenting comments this way can reduce ambiguity between sample rounds. It doesn’t guarantee fewer revisions or lower sampling costs — that depends on the garment’s complexity and how many issues surface — but it does make each round of feedback easier to act on. [Internal link: How to Save Money on Clothing Brand Sampling] looks at related ways to keep development efficient.
How Sample Revisions Connect Back to the Tech Pack
Every confirmed change from a sample review should eventually make its way back into the tech pack. That includes updated measurements, revised construction notes, an updated BOM, changed materials, revised artwork placement, updated labels, changed grading information, and a recorded sample comment history.
Keeping the tech pack synchronized with the current approved version matters because that document is what gets referenced going forward — by the same factory, a different vendor, or your own team later on. Sending an outdated version after a sample has already changed reintroduces exactly the kind of ambiguity the tech pack was meant to prevent in the first place. [Internal link: How to Create a Tech Pack for a Clothing Brand] covers building a document structured to handle revisions cleanly from the start.
Prepare Your Tech Pack for Sampling
If you’re organizing technical information across multiple styles ahead of manufacturer review, the Complete Tech Pack Library can provide a structured starting point for documenting specs consistently.
Sample Stages You May Encounter
Terminology here varies significantly by manufacturer, and not every factory uses all of these stages.
Proto / Development Sample
Often used to establish basic construction and silhouette early in development. What exactly this includes — and whether it’s expected to be close to final measurements — varies by factory.
Fit Sample
Where a manufacturer distinguishes this from an initial proto, it typically focuses more specifically on fit and measurement accuracy.
Revised Sample
Incorporates changes identified during a review round. There may be one revised sample or several, depending on how many issues came up.
Pre-Production Sample
Some manufacturers use this to represent a later, closely-approved sample made just before bulk production begins. Requirements at this stage — and what it’s called — differ between factories.
How the Process Changes by Garment Type
| Garment type | Areas that often need extra attention |
|---|---|
| Basic T-shirt | Fit, neckline, fabric behavior, shrinkage, artwork |
| Hoodie / sweatshirt | Hood shape, rib, drawcords, pocket construction, fabric weight |
| Pants | Rise, inseam, waistband, pocket placement, leg shape |
| Outerwear | Lining, closures, construction layers, pocket function, technical materials |
| Complex fashion garment | Pattern engineering, panel construction, build sequence, specialty details |
| Graphic-heavy garment | Artwork size and placement, decoration method, color accuracy, repeatability |
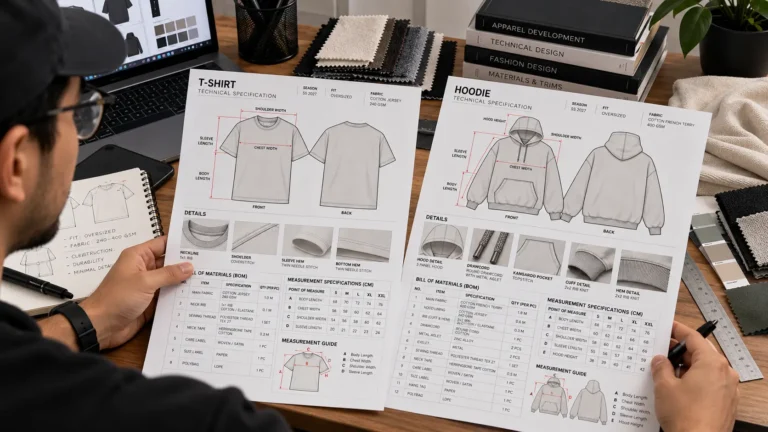
These are general tendencies, not fixed rules — a simple T-shirt with a complicated print placement can require just as much attention as a structured jacket. T-Shirt Tech Pack Template and Hoodie Tech Pack Template for Factory Production break down documentation specific to those categories.
What You Should Prepare Before Sending Your Tech Pack for Sampling
A useful checklist to review before submission:
- Finalized style information and current technical flats
- Construction notes
- A complete or sufficiently developed BOM
- Fabric and trim specifications
- Color references
- Artwork files and placement measurements
- A measurement specification sheet, with tolerances where applicable
- Size range and grading information, if relevant
- Label and packaging details
- Reference images
- Pattern information, if you’re supplying one
- Current revision number
- Correctly named, approved source files
- Any manufacturer-specific submission requirements
Not every item applies to every garment or every development setup — a basic style with no print won’t need artwork placement notes, for example. The point is having what’s genuinely relevant ready before the review stage, rather than during it.
Tech Pack-to-Sample Workflow Example
Here’s a simplified, fictional illustration for a basic oversized T-shirt. This isn’t a universal timeline — it’s meant to show how the stages connect.
Style: Oversized T-Shirt
- Designer completes the tech pack — flats, measurements, fabric spec, and construction notes are finalized.
- Manufacturer reviews specifications — checking for gaps or unclear instructions before development starts.
- Fabric and trim availability is confirmed — including whether the specified fabric weight and color are in stock.
- Pattern is developed or adjusted — using an existing block for a similar silhouette, modified to match the spec.
- Sample is cut and sewn — the sample room builds the garment from the confirmed pattern and materials.
- First sample is reviewed — checked against the spec sheet for fit, proportion, and construction.
- Fit and construction comments are documented — using a structured comment format rather than verbal notes.
- Tech pack and/or pattern are revised — updated measurements and notes are reflected in the document.
- Revised sample is developed, where necessary — addressing the specific issues raised.
- Final development specifications are aligned — for handoff into the next production stage.
How to Avoid Common Sampling Problems
Several avoidable issues show up repeatedly in apparel development: sending an outdated tech pack after changes were made, missing measurements, unclear tolerances, conflicting construction notes, an incomplete BOM, vague artwork placement, unconfirmed material substitutions, missing trim details, weak revision control, undocumented sample comments, assuming the first sample is final, skipping a direct comparison between the sample and the spec sheet, not confirming a specific factory’s submission requirements, overlooking how a material actually behaves once sewn, and making verbal changes that never get written down.
Better documentation and clearer communication reduce a lot of this friction, though they can’t eliminate every sampling issue — some only surface once a garment physically exists.
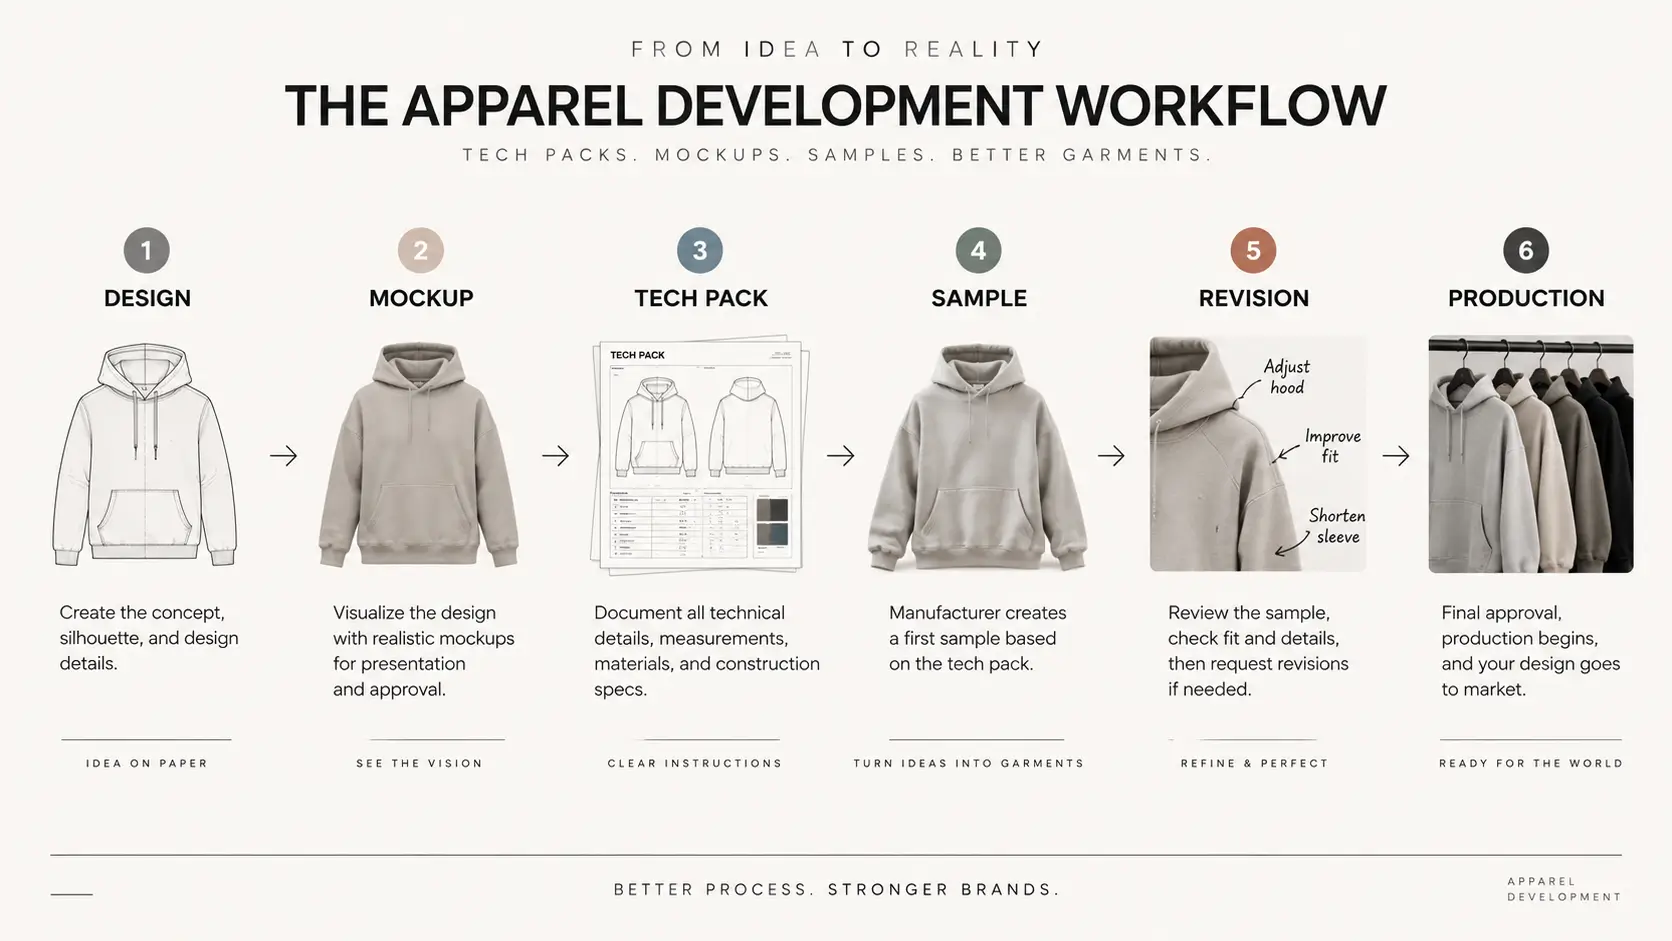
How Tech Packs, Mockups, and Samples Fit Into the Apparel Workflow
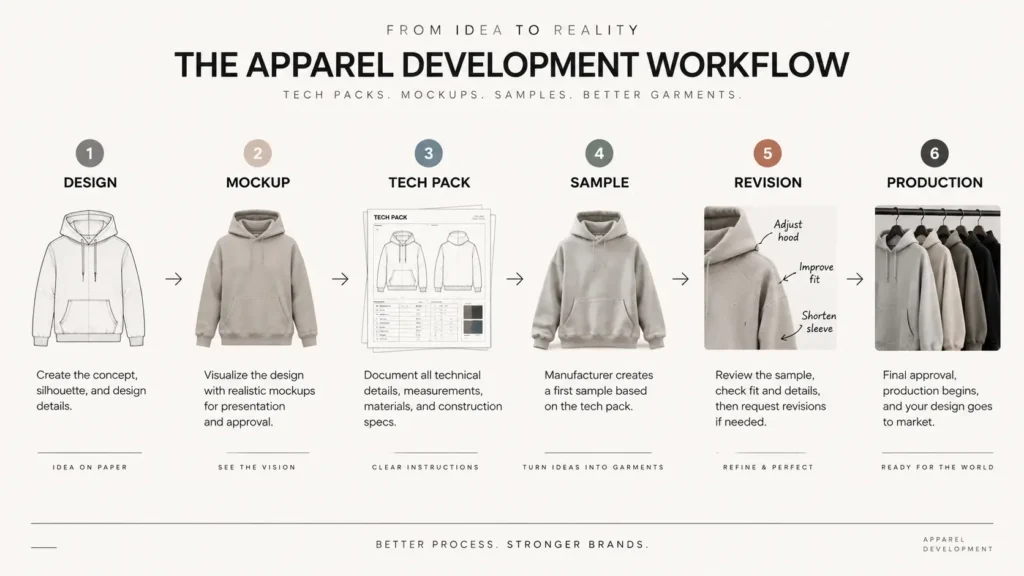
It helps to see the whole development arc as one connected sequence:
Design → Mockup → Tech Pack → Sample → Revision → Production
- Design develops the garment concept and overall intent.
- Mockup visualizes how the garment may look before physical development begins.
- Tech pack documents the technical information needed to communicate the garment clearly.
- Sample turns that documented concept into a physical garment for real evaluation.
- Revision records and applies changes based on fit, construction, material, or artwork review.
- Production carries the approved development information into manufacturing, following whatever process has been agreed.
Digital mockups and technical documentation serve real purposes earlier in this sequence, but they’re not substitutes for physical sample development — a mockup shows intended appearance, while a sample shows how the garment actually behaves. Best Clothing Mockups for Fashion Designers covers that earlier stage in more depth.
Fiber content and country-of-origin information that ends up on a garment’s label is also subject to specific regulatory requirements in markets like the U.S., which is worth keeping in mind when finalizing label specs during sampling. U.S. textile labels must disclose fiber content, manufacturer identification, and country of processing or manufacture.
Frequently Asked Questions
What happens after a tech pack is sent to a manufacturer?
The document is typically reviewed for clarity and feasibility, materials and trims are confirmed, a pattern is developed or adjusted, and a sample is constructed — though the exact order and who’s involved varies by manufacturer.
How long does it take to go from a tech pack to a sample?
Timing varies significantly based on garment complexity, material availability, pattern development needs, factory workload, shipping, and how many revision rounds are required. There’s no standard number of days that applies across manufacturers.
Does a tech pack guarantee the first sample will be correct?
No. A tech pack reduces ambiguity, but the first physical sample is still a development tool used to evaluate fit, construction, and materials — revisions are a normal part of that process.
What is a tech pack sample?
The term generally refers to a garment sample developed using the specifications in a tech pack. Manufacturers may use different names for this and later sample stages.
What is the difference between a tech pack and a pattern?
A tech pack documents design intent and specifications. A pattern translates that intent into physical pieces that can be cut and sewn — they serve different, complementary functions.
What information does a factory need before making a sample?
Generally: technical flats, construction notes, a BOM, measurement specs, artwork files with placement details, and clear communication about anything ambiguous in the document.
How many samples do I need before production?
There’s no universal number. It depends on the garment’s complexity, fit expectations, construction challenges, fabric behavior, artwork, and the specific development agreement with your manufacturer.
Should I update the tech pack after sample revisions?
Yes — the tech pack should reflect the current approved specifications before moving toward production, so everyone involved is working from the same version.
Conclusion
Getting from a tech pack to a finished garment sample involves more than sending a document and waiting. It typically moves through document review, material and trim confirmation, pattern development, physical construction, and one or more rounds of review and revision — with the exact path shaped by your manufacturer, garment type, and sourcing setup.
A few things worth carrying forward: a tech pack is the starting reference, not a guarantee of a correct first sample; revisions are a normal part of development, not a failure; and keeping your documentation synchronized with each approved change matters as much as the original tech pack itself.
If you’re still organizing your technical documentation, the Complete Tech Pack Library offers a structured starting point for building specs across styles. If you’re working in Illustrator and preparing files for factory handoff, the Adobe Illustrator Tech Pack Template can help keep that documentation organized and editable as your samples evolve.