Design - Create - Grow

If you’re launching a clothing brand, you’ve probably heard the term thrown around at trade shows, in YouTube videos, and across every beginner’s Facebook group. It leaves most new designers asking the same question: exactly what is a tech pack in fashion?
You’re not alone — and the confusion is completely understandable.
What is a tech pack in fashion, simply put, is the single most important document you’ll create before sending your designs to a manufacturer. It’s the difference between receiving a perfect first sample and wasting $300 on something that looks nothing like what you envisioned.
Here’s a scary-but-common story: a designer emails a factory a sketch and a vague description. Six weeks later, a sample arrives in the wrong fabric weight, with pockets in the wrong position, and a neckline that’s two inches too wide. That’s a $200–$500 mistake — and it’s entirely preventable.
In this guide, you’ll learn:
- What a tech pack actually contains (no jargon left unexplained)
- Why factories require them before they’ll take your order seriously
- Whether to build one from scratch or use a template
- The 7 best tech pack resources for beginners in 2026
- A step-by-step process to create your very first one
By the end, you’ll know exactly what you need — and you’ll be ready to move forward with confidence.
⚡Quick Answer: What Is a Tech Pack in Fashion?
A tech pack (short for technical package) is a detailed document that tells a clothing factory exactly how to build your garment — from measurements and materials to stitching and colorways. Think of it as a blueprint that bridges your design vision and what actually comes off the production floor. Without one, factories are essentially guessing.
Understanding the Basics: What Is a Tech Pack?
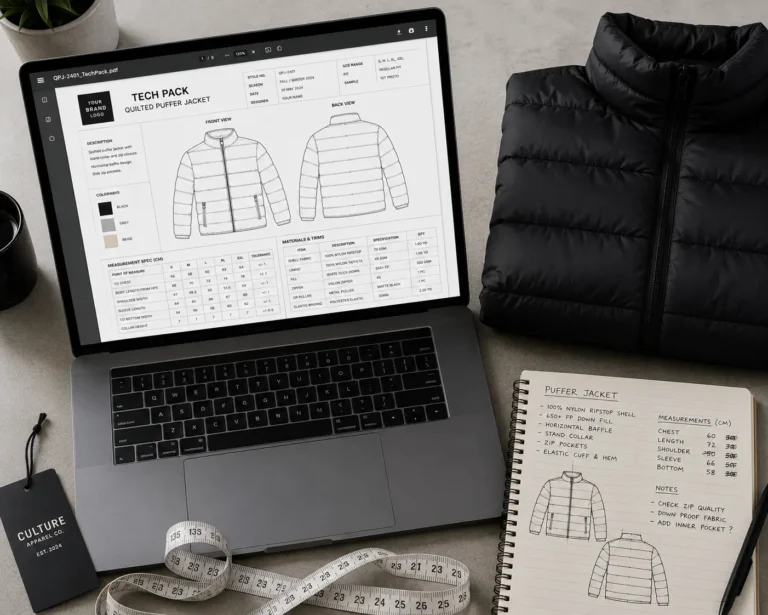
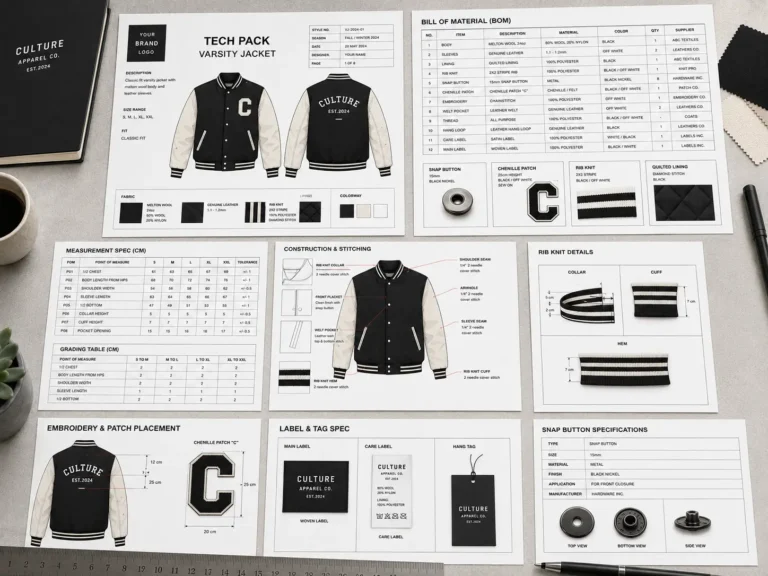
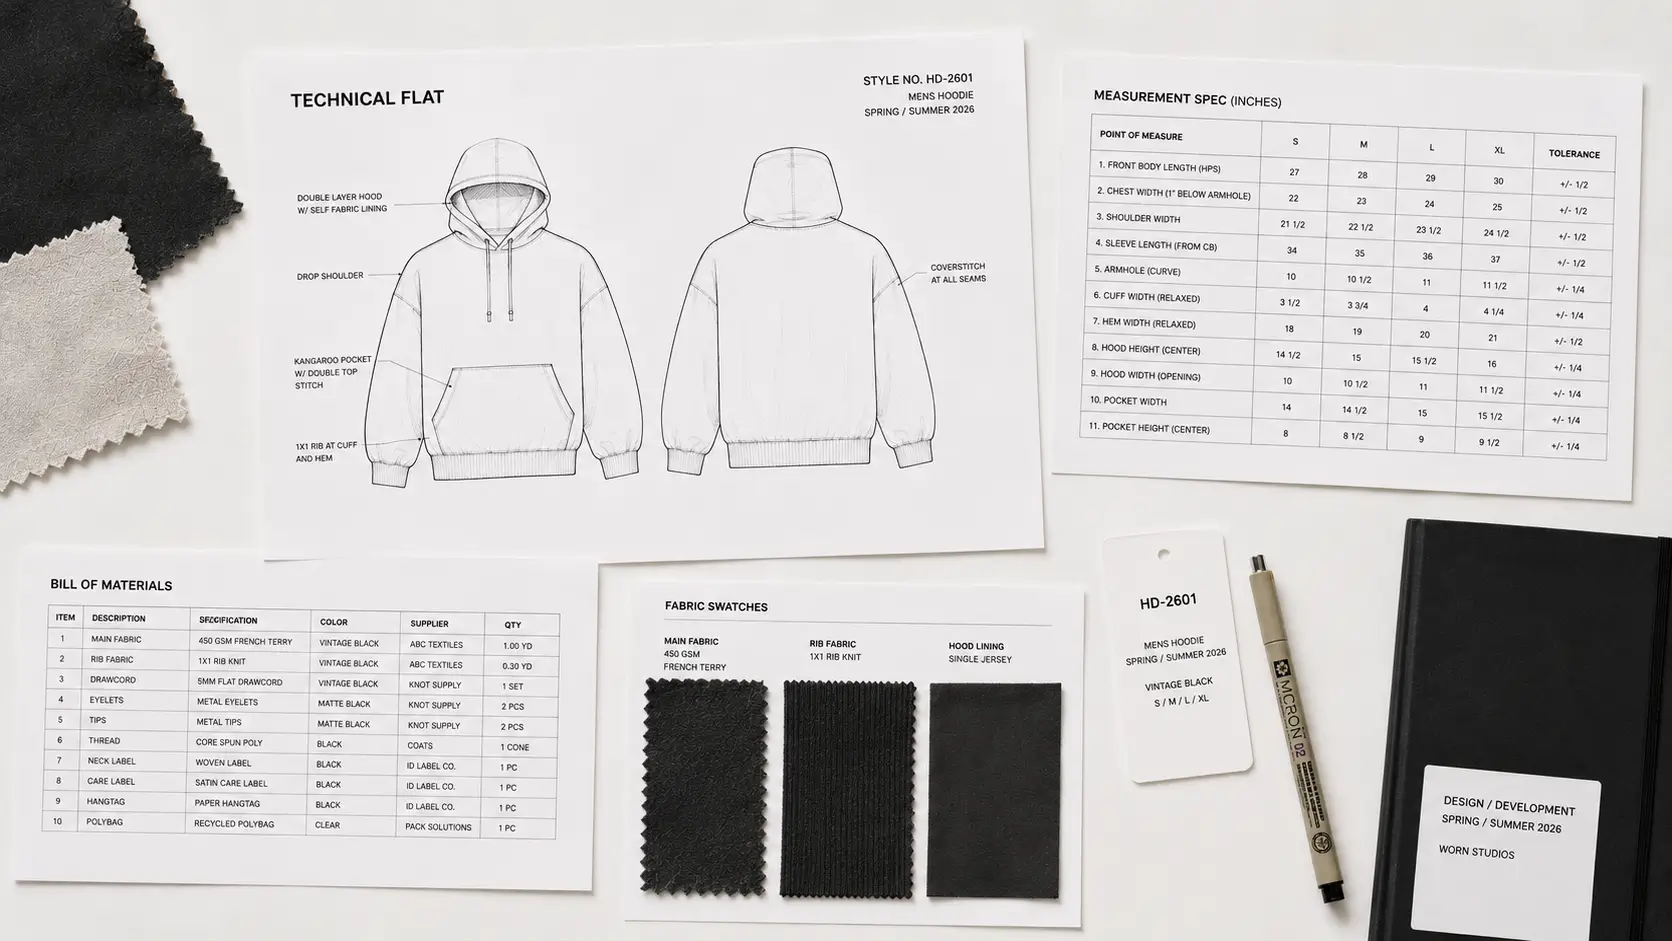
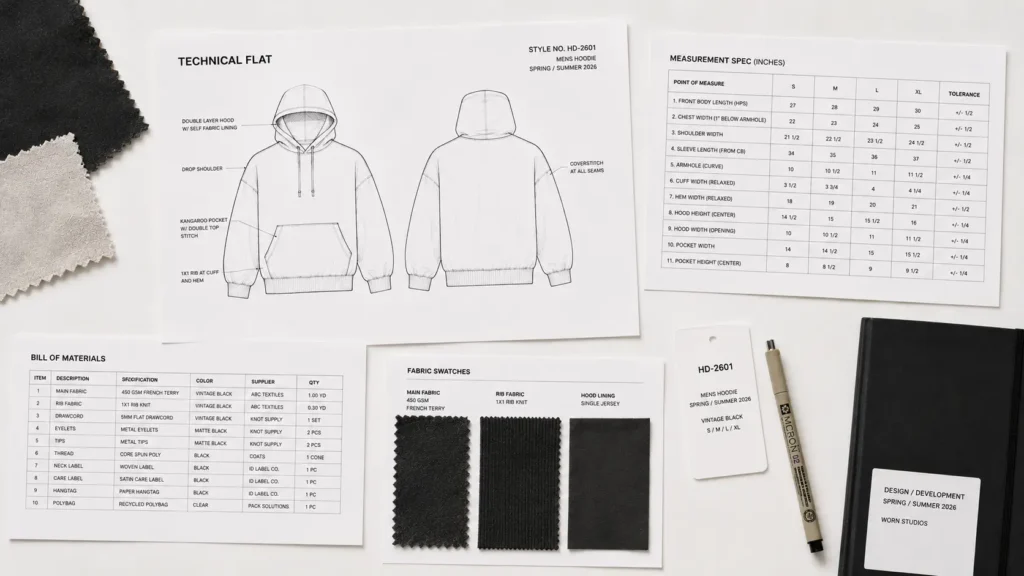
A tech pack is a standardized document that communicates every technical detail of a garment to a clothing factory. It typically includes flat sketches, a bill of materials (BOM), a spec sheet with measurements, construction notes, and artwork placement guides.
In short: it’s the rulebook your factory follows to build your product.
Why Do Factories Require Tech Packs?
Factories work with dozens — sometimes hundreds — of brands at once. They don’t have time to interpret vague descriptions or decipher hand-drawn sketches. A proper tech pack eliminates miscommunication and gives them everything they need to produce your garment accurately.
Benefits of using a tech pack:
- ✓ Fewer sample revisions (saving you hundreds of dollars)
- ✓ Faster production timelines because there’s no back-and-forth guessing
- ✓ Professional credibility when approaching overseas manufacturers
- ✓ Standardized sizing across a full production run
- ✓ A paper trail if something goes wrong
Core Components of a Tech Pack
Every solid tech pack includes these building blocks:
- Flat Sketches — Front, back, and detail views of the garment, usually created in Adobe Illustrator
- Bill of Materials (BOM) — A complete list of every physical component: fabrics, thread, zippers, labels, hang tags
- Spec Sheet — A detailed measurement chart with Points of Measure (POMs) and tolerances
- Construction Notes — Specific stitching types, seam allowances, finishing details
- Colorways — Pantone color codes and artwork placement with exact dimensions
💡Pro Tip: Always include a tolerance (+/−) in your measurement spec sheets so factories know the acceptable margin of error. A tolerance of +/−0.5 cm is standard for most woven garments.
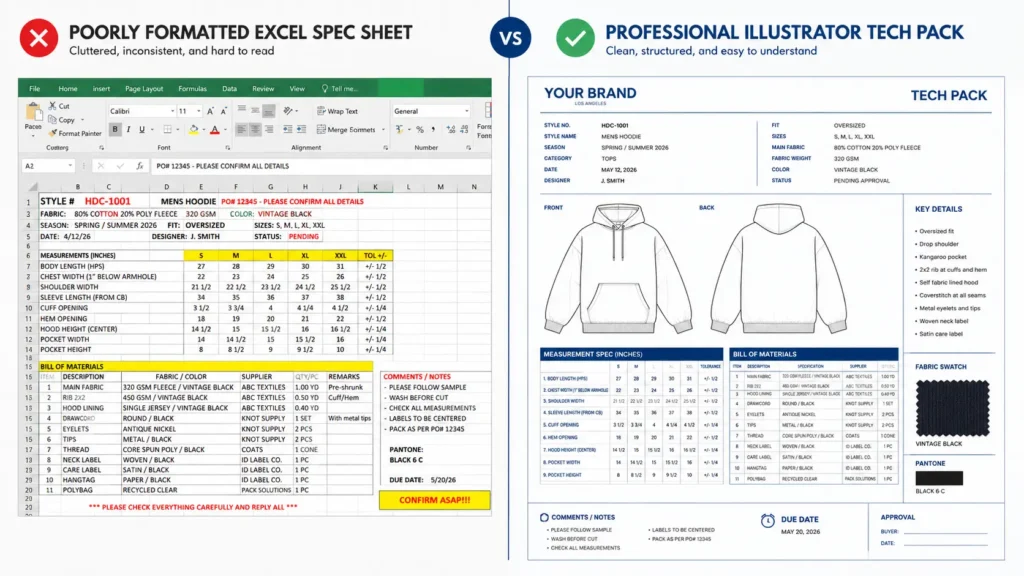
DIY vs. Template Tech Packs: What’s Actually Worth Your Time?
Here’s the honest truth: you can build a tech pack from scratch using Google Sheets and a hand-drawn sketch. For a basic blank t-shirt going to a domestic printer, that might even be fine.
But for anything going to an overseas manufacturer — especially if you’re new to this — the fashion tech pack explained through a professional template will save you enormous headaches.
Side-by-Side Comparison:
| Feature | DIY Spreadsheet | Basic Template ($9.99) | Premium Bundle | Hire a Freelancer |
|---|---|---|---|---|
| Factory Acceptance | ✗ Often rejected | ✓ Accepted | ✓ Accepted | ✓ Accepted |
| Time to Create | 8–15 hours | 1–3 hours | 1–3 hours | 1–2 weeks wait |
| Accuracy | Low (easy to miss fields) | High | Very High | High |
| Cost | ~$0 | $9.99 | ~$30–50 | $150–$500+ |
| Ease of Use | ✗ Steep learning curve | ✓ Beginner-friendly | ✓ Guided | ✓ Hands-off |
The DIY route works when:
- You have a fashion design background and already know spec sheet standards
- You’re producing a very simple, single-SKU garment
- You have time to research industry formatting standards yourself
But if you’re a clothing tech pack beginner without years of garment manufacturing experience, a $9.99 template that’s already formatted to factory standards is a no-brainer investment. The time alone is worth it — and one avoided sample revision pays for the template ten times over.
Top 7 Tech Pack Solutions & Resources for Beginners
1. S.i. Graphics Fashion Tech Pack Template — Best for Beginners
The most beginner-friendly professional template on the market. Designed specifically for new clothing brand owners and streetwear founders, this template walks you through every section step by step — no fashion school required.
Price: $9.99
What’s included:
- Pre-formatted spec sheet with POMs
- Flat sketch placeholders
- Bill of Materials section
- Colorway and artwork placement pages
- Construction notes fields
Best for: First-time designers, streetwear brands, clothing brand startups
Pros:
- ✓ Fraction of the cost of hiring a freelancer
- ✓ Industry-standard formatting accepted by overseas factories
- ✓ Editable in Adobe Illustrator and PDF editors
- ✓ Immediate download — no waiting
- ✓ Lifetime access with no subscription fees
Cons:
- ✗ Covers core garment types; very niche technical styles may need customization
- ✗ Requires basic Adobe Illustrator or PDF editor knowledge
2. S.i. Graphics Tech Pack Mega Bundle — Best Overall Value
The complete toolkit for serious clothing brand founders. If you’re building a full collection — hoodies, joggers, tees, outerwear — the Mega Bundle covers every garment type in one package. It’s the smart upsell for anyone planning to scale.
Price: Check current pricing at sigraphics.co
What’s included:
- Multiple garment-type tech pack templates
- Bonus mockup assets
- Extended material and trim reference sheets
- Priority formatting guides
Best for: Brand founders building a full collection, designers working across multiple garment categories
Pros:
- ✓ Everything in one purchase — no piecing together separate templates
- ✓ Consistent formatting across all garment types looks professional
- ✓ Includes bonus assets that speed up the design-to-factory workflow
- ✓ Best cost-per-template value available
Cons:
- ✗ More than a beginner needs for a single product launch
- ✗ Slight learning curve if using multiple templates simultaneously
3. Techpacker App — Best for Large Teams & Agencies
Techpacker is a cloud-based platform built for design teams and agencies managing multiple clients and SKUs simultaneously. It’s powerful — and priced accordingly.
Price: Starts around $49/month (team plans higher)
What’s included:
- Cloud-based tech pack builder
- Collaboration and commenting tools
- Factory communication portal
- Template library
Best for: Design studios, brands with in-house design teams, agencies managing multiple client collections
Pros:
- ✓ Real-time collaboration between team members
- ✓ Organized library for managing many SKUs
- ✓ Built-in factory communication features
Cons:
- ✗ Monthly subscription adds up quickly for solo founders
- ✗ Overkill and expensive for a first collection of 1–3 styles
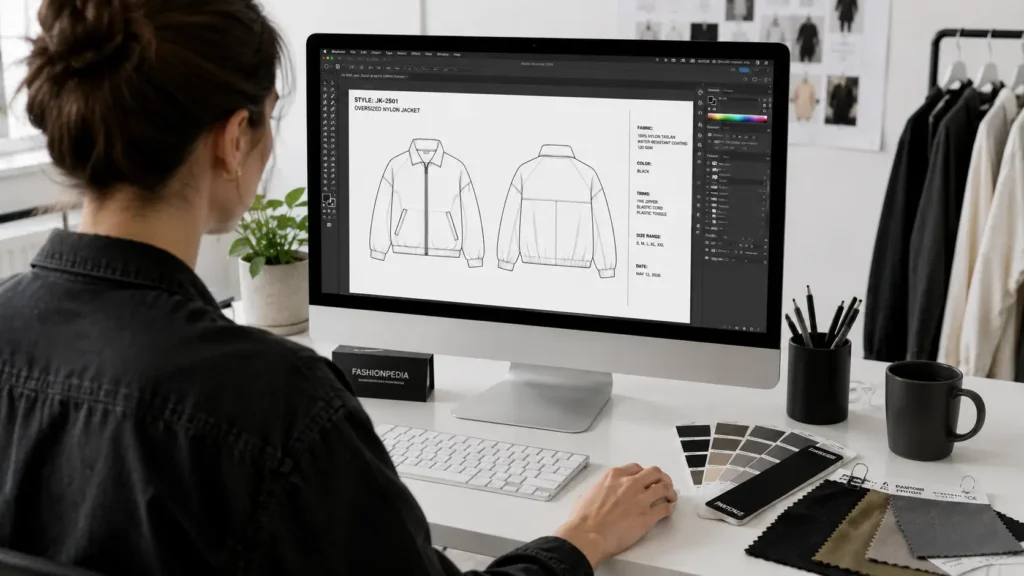
4. Adobe Illustrator (from Scratch) — Best for Advanced Designers
If you’re already proficient in Adobe Illustrator and have a strong garment construction background, building tech packs from scratch gives you maximum control and customization. This is the industry-standard software used by professional fashion designers.
Price: ~$22.99/month (Creative Cloud subscription)
What’s included:
- Full vector design toolkit
- Custom template creation capabilities
- Industry-standard file format output
Best for: Experienced fashion designers, technical designers with manufacturing knowledge
Pros:
- ✓ Complete creative control over layout and design
- ✓ Produces the highest-quality flat sketches
- ✓ Industry-standard software recognized worldwide
Cons:
- ✗ Steep learning curve for beginners — not intuitive for non-designers
- ✗ No pre-built garment spec structure — you start from a blank canvas
- ✗ Monthly cost adds up; no one-time purchase option
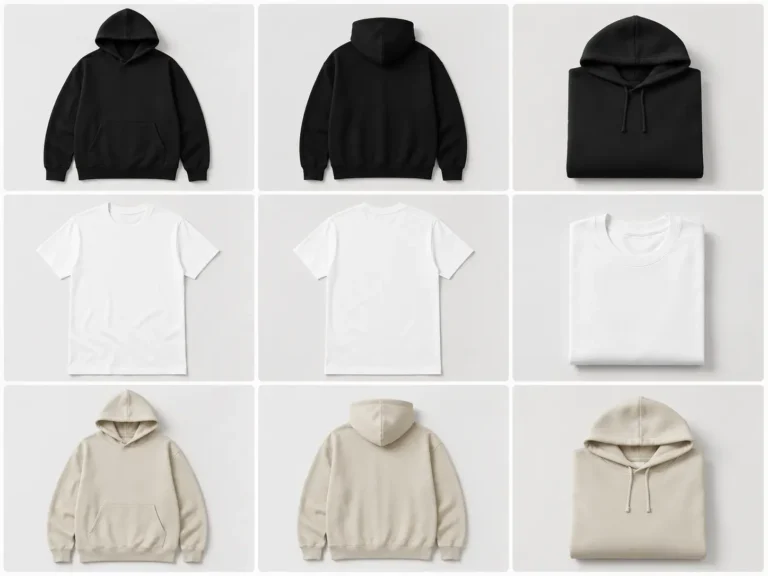
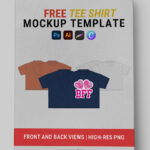
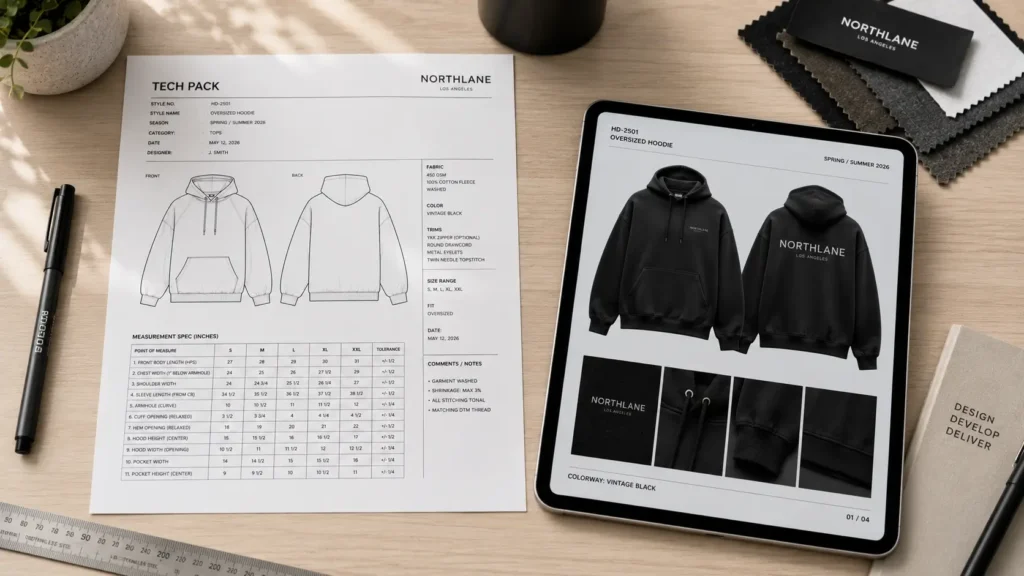
5. S.i. Graphics FREE Streetwear Mockups Pack — Best Free Resource
Before you send a tech pack to a factory, you need to visualize your design. That’s exactly what the free S.i. Graphics Streetwear Mockups Pack is for. Use it alongside your tech pack to confirm colorways, graphic placement, and overall aesthetic before going into production.
Price: FREE
What’s included:
- Professional streetwear garment mockups
- Easily customizable in Photoshop
Best for: All clothing brand founders — especially anyone using social media or crowdfunding to validate a design before ordering
Pros:
- ✓ Completely free — zero risk to try
- ✓ Helps you catch design issues before they become expensive factory mistakes
- ✓ Perfect for Instagram/social media product previews
- ✓ Builds confidence that your design is ready before investing in samples
Cons:
- ✗ Mockups are for visualization only — not a substitute for a proper tech pack when ordering from factories
6. Google Sheets / Excel — Best Free DIY Alternative
Yes — you can technically build a basic tech pack in a spreadsheet. For very simple garments (a plain t-shirt, a basic tote bag) heading to a domestic screen printer, a well-organized spreadsheet can communicate the basics. But be prepared for limitations.
Price: Free (Google Sheets) / Included with Microsoft 365
What’s included:
- Blank grid — you build everything from scratch
- No pre-set garment measurement fields
- No flat sketch integration
Best for: Designers with strong garment manufacturing knowledge making ultra-simple products
Pros:
- ✓ Completely free
- ✓ Familiar interface for most people
Cons:
- ✗ No industry-standard formatting — many factories will reject or ignore it
- ✗ Extremely time-consuming to build correctly without a template
- ✗ Easy to miss critical fields (tolerances, grading, construction details)
- ✗ Poor visual presentation compared to professional templates
💡Pro Tip: If you go the spreadsheet route, at minimum research ASTM or ISO garment measurement standards so your spec sheet uses recognized measurement points.
7. Upwork Freelancers (Technical Designers) — Best for Hands-Off Founders
If you have zero design software skills and a healthy budget, hiring a freelance technical designer on Upwork or a similar platform can get you a polished, factory-ready tech pack without touching Illustrator once.
Price: $150–$500+ per tech pack (varies widely by designer experience)
What’s included:
- Custom-built tech pack for your specific garment
- Professional flat sketches
- Spec sheet with grading
- Usually includes 1–2 rounds of revisions
Best for: Non-designer founders who have the budget and prefer to outsource
Pros:
- ✓ Completely hands-off
- ✓ Experienced designers know exactly what factories need
- ✓ Good option for complex, highly technical garments
Cons:
- ✗ Expensive — especially painful for a first collection
- ✗ Communication delays can slow your timeline significantly
- ✗ You’re dependent on a third party for every future revision
- ✗ Quality varies wildly depending on the freelancer
How to Create Your First Tech Pack (Step-by-Step)
Ready to build a clothing tech pack for beginners the right way? Here’s a practical framework you can follow with any template or software.
Step 1: Create Your Flat Sketches
Draw or trace your garment in a clean, front-and-back flat view — meaning no body, no shading, just the garment lying flat. Include close-up callouts for any special details (pockets, zipper pulls, seam placement).
If you’re not a skilled illustrator, pre-made vector flat templates (often included in tech pack template bundles) are a legitimate shortcut that factories accept without issue.
Step 2: Build Your Bill of Materials (BOM)
List every single physical item that goes into making your garment:
- Main fabric — with weight, content percentage, and fabric construction (e.g., 280gsm 100% French terry)
- Lining or underlining (if applicable)
- Trim — zippers, buttons, drawcords, aglets
- Thread — color and type
- Labels — woven neck label, care label, size label
- Hang tags and packaging
The more specific you are here, the fewer back-and-forth emails you’ll exchange with your factory.
Step 3: Complete Your Measurements & Spec Sheet
This is the most technical section of a clothing tech pack for beginners to master. List every Point of Measure (POM) — chest width, body length, sleeve length, hem width — and include:
- Measurements for each size in your range (S, M, L, XL)
- Grade rule between sizes (e.g., +1 inch per size on chest)
- Tolerance per measurement (e.g., +/−0.5 cm)
💡Pro Tip: Most beginner designers forget to include grading. Even if you’re only producing one size initially, your factory needs to know your grade rules for future runs.
Step 4: Define Your Colorways & Artwork Placement
Specify every color using Pantone color codes (not “navy blue” — factories interpret that differently than you do). For any graphic or embroidery:
- Provide exact placement dimensions in inches from a reference point (e.g., “center chest logo, 3.5″ wide, positioned 3″ below the neckline seam”)
- Include production file formats accepted by your supplier
Step 5: Add Construction Notes
Document anything that isn’t communicated by the sketch or measurements: stitch type (flatlock, coverstitch, single needle), seam finish, zipper type and color, pocket bag lining color, and so on.
This is where experienced fashion designers earn their fees — small details here prevent expensive surprises on the production floor.
Frequently Asked Questions
What happens if I don’t use a tech pack for manufacturing?
Without a tech pack, your factory is guessing. At best, you’ll get a sample that needs two or three costly revisions before it looks right. At worst, factories — especially overseas — will reject your order entirely or produce 500 units of something you can’t sell. Every round of sampling costs $150–$500+. A tech pack eliminates most of that waste upfront.
What software do I need to edit a tech pack template?
It depends on the template format. Most professional tech pack templates are built for Adobe Illustrator (.ai files) or come as editable PDFs (editable in Adobe Acrobat, Preview on Mac, or free tools like Sejda). Some templates are also available in Excel or Google Sheets format. S.i. Graphics templates are designed for maximum accessibility — check the product listing for specific file format details.
What is the difference between a tech pack and a sewing pattern?
These are two completely different documents. A tech pack contains written specifications, measurements, material lists, and sketches — it tells the factory what to make and how it should be made. A sewing pattern is the actual physical or digital cutting template: the paper or digital shape that fabric is cut from. Professional factories create their own sewing patterns from your tech pack.
Do I need to know how to draw to make a tech pack?
No — and this surprises a lot of beginners. Pre-built tech pack templates come with vector flat sketch placeholders that you can customize without drawing ability. You can also use existing flat sketch libraries in tools like Adobe Illustrator or hire a technical flat sketch artist on Fiverr for $20–$50 per sketch. The spec sheet, BOM, and construction notes sections require zero artistic skill.
What is a Bill of Materials (BOM)?
A Bill of Materials (BOM) is a comprehensive list of every physical component required to manufacture one unit of your garment. This includes main fabric (with specific technical details), lining, all trim items (zippers, buttons, drawcords), thread, all labels (neck, care, size), packaging, and hang tags. The BOM helps your factory source materials accurately and gives you a basis for costing your garment.
How much does a professional tech pack cost to make?
The cost varies widely depending on your approach:
- DIY from scratch: ~$0 in money, but 10–20 hours of your time (and high risk of errors)
- Beginner template: $9.99 (1–3 hours to complete)
- Premium template bundle: $30–$50 (covers multiple garment types)
- Hire a freelancer: $150–$500+ per garment type
- In-house technical designer salary: $50,000–$80,000/year
For most beginner clothing brand owners, a $9.99 template is the single most cost-effective starting point available.
Can I use a tech pack for print-on-demand?
Generally, no — and this is an important distinction. Print-on-demand (POD) services like Printful or Printify handle all manufacturing specifications internally. You only need to provide artwork files and mockups. A tech pack is specifically for cut-and-sew manufacturing, where a factory is building your garment from raw materials. If you’re using POD, start with mockups instead. Download our FREE Streetwear Mockups for POD brands
What is a spec sheet?
A spec sheet (specification sheet) is the measurement section of your tech pack. It lists every Point of Measure (POM) on the garment — such as chest width, body length, sleeve length, and collar height — along with measurements for each size in your range. It also includes the grade rule (the increment between sizes) and the tolerance (the acceptable margin of error) for each measurement. The spec sheet is what your factory’s quality control team uses to check samples against.
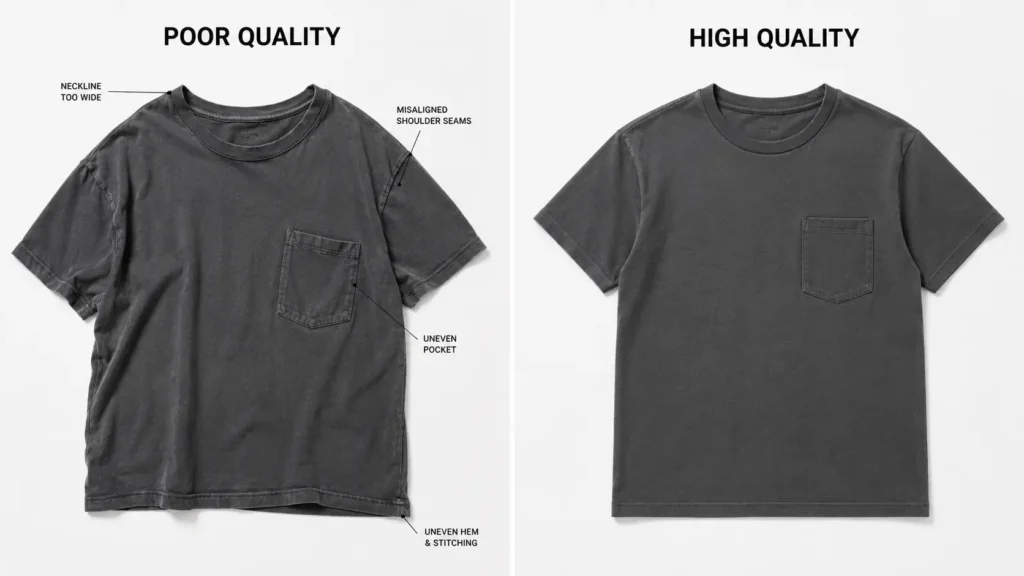
How do I know my tech pack is complete enough for a factory?
A factory-ready tech pack should answer: What does it look like? What is it made of? What are the measurements? How is it constructed? If you can clearly answer all four questions with your document — including tolerances on measurements and Pantone codes for colors — you’re in good shape. When in doubt, email your factory a draft and ask for feedback before finalizing.
Do factories provide tech pack templates?
Some factories — particularly larger or more experienced ones — will send you their own preferred template format when you first contact them. This is actually ideal when it happens. However, many factories (especially if you’re cold-outreaching manufacturers in Asia) expect you to arrive with a professional, standardized document. Having your own template ready shows you’re a serious buyer.
Conclusion: You Now Know More Than Most New Designers Do
Understanding what a tech pack in fashion is is is genuinely the foundation of a successful clothing brand. Most beginner designers skip or rush this step — and pay for it in botched samples, rejected orders, and wasted months.
Key takeaways from this guide:
A tech pack is a blueprint document that tells your factory exactly how to build your garment
It includes flat sketches, a Bill of Materials, a spec sheet, construction notes, and colorways
Without one, you risk expensive sampling mistakes and factory rejections
Templates are the fastest, most affordable path for beginners — especially at just $9.99
Ready to take action?
👉 Download our FREE Streetwear Mockups Pack. Start here — zero cost, instant download. Visualize your designs before investing in samples.
👉 Grab the $9.99 Beginner Tech Pack Template. The fastest way to go from idea to factory-ready in a single afternoon.
👉 Upgrade to the Tech Pack Mega Bundle. Building a full collection? Get every template you need in one package.
Your factory is ready when you are. The only thing standing between your design and your first production run is the document — and now you know exactly how to build it.